Professional Pixie Unit 3: Going Beyond Readings
Downloads:
Download the Unit:
| professional_pixie_unit_3_going_beyond_readings.pdf |
Extras:
| anatomy_of_a_sales_page_cheat_sheet.pdf |
Lesson 1: What You Can Sell Outside of Services
You can only sell so many of your services. As one person, you’re only capable of doing so much! So there is a ceiling on the number of readings/consultations you can do. Once you start filling up your consulting/reading schedule, it becomes time to move on to products. Technically, you can start selling products at any time, but you won’t sell much if you don’t have an established audience - and namely, an email list! So you want to get all of your ducks in a row first. No unhatched chicken counting!
E-books
An e-book is a book that is available to be read online. There are various ways of doing this, but the two most used are either self-publishing on the platform Kindle Direct Publishing (KDP for short) through Amazon and selling on their website, or creating the e-book as a PDF file and selling it yourself.
If you choose to sell through KDP, you have to format the file specifically to their standards, which used to be craaaazy difficult to do. It seems Amazon got with the program though, and now they have a free program you can download to your Mac or PC, Kindle Create, which will turn your Word or PDF file into a file for Kindle. Wish that was around when I did it!
The advantage of selling an e-book this way is you have a wider reach because your e-book is being sold on Amazon. It can also be seen as more reputable, and make you seen as more trustworthy because you’re selling your e-book on a well-known and trusted platform. The main disadvantage of selling an e-book this way is that you don’t make as much money per sale. The exact amount depends on whether or not you choose to sign up for KDP Select. This special option gives you more money per sale - 70% - but you can only price your e-book between $2.99 and $9.99, and you have to sell it exclusively on Amazon, it can’t be available anywhere else; if you want to price your e-book higher or make it available elsewhere, royalties are 35%.
You also have a lot of competition on Amazon, so you still have to put in a lot of effort selling it through your own audience and leverage your email list. Just putting it up on Amazon likely isn’t going to result in any sales. You’ll still have to prime your email list to buy.
KDP Select info: https://kdp.amazon.com/select?ref_=TN_se
KDP Select FAQ’s: https://kdp.amazon.com/help?topicId=A6KILDRNSCOBA
Royalty Options: https://kdp.amazon.com/help?topicId=A30F3VI2TH1FR8
List Price Requirement: https://kdp.amazon.com/help?topicId=A301WJ6XCJ8KW0
KDP general info: https://kdp.amazon.com/help?topicId=A3R2IZDC42DJW6
Selling an e-book yourself can be easier on the backend - all you have to do is create a PDF file of your e-book, which you can do using Adobe Acrobat (paid) or Google Drive (free). You can create the cover image yourself using a free platform like Canva, or pay someone to do it inexpensively on a place like Fiverr, and you’re ready to go. The biggest advantage of selling it yourself is you can price it whatever you want, keep all of the money, and sell it wherever you want. If you price an e-book that you sell yourself at $25, you’d need to sell 3 times more with Amazon to make the same amount of money as selling it yourself. Big advantage!
The disadvantage to selling an e-book yourself is it takes more work for you to do. First, you have to figure out a way to distribute it. There are lots of different platforms you can use to sell digital files that will be provided as a digital download to people once they buy your e-book. None of them are free, unfortunately, but you can choose between paying monthly (up-front, like with Shopify, E-Junkie, or SendOwl) or paying per transaction (like Gumroad or Sellfy - nothing upfront but percentage can be higher unless you opt to pay monthly). Even with those costs, you still end up making more selling yourself compared to KDP, but you have to do the work with setting it up through the platform you choose and making it available on your website or blog, or setting up an ecommerce site.
Like with Amazon, you’ll also still have to put in effort to sell it and use your email list, turning subscribers into buyers. So no matter what, your email list matters!
Compared to offering services, the big advantage with e-books is you can sell an unlimited amount. You make it once and then you’re done. Compared to offering courses, the advantage with e-books is because they’re smaller and less expensive, you usually sell more of them, and it doesn’t require as much promoting to sell them. BUT services and courses can be sold for more money, so you don’t need to make as many sales of them to make as much or more than you make from e-books. I think e-books are a good to get you started with products, but if they’re going to be your main income stream, you’ll likely need a LOT of them or a pretty large and engaged list.
I actually sold 2 astrology e-books using KDP like, 8 years ago I think (losing track of time!). I didn’t have an email list yet, so I think I made a whopping $100. I’ve sold 3 e-books on my own, but had an email list by the time I started, so did a lot better! You’ll need to sell 2-3x’s as much using KDP to make the same amount as selling on your own. Make no mistake, some people do incredibly well on Amazon, but it seems like you need a big loyal audience first. It’s also changed a LOT since I tried it back then, and there’s soooo much competition now that it’s not as easy to get lucky (there used to be stories like that back then, but you don’t hear them too much now).
Online Courses
You’ve probably read or heard from many online entrepreneurs that selling online courses is the way to go if you want to have an online business. While I wouldn’t say it’s the way to go for everyone, it is a fantastic way to make passive income (which is income you make on something that sells without you doing any work, so it can’t be a service or something you have to be involved in or do work for on each sale).
An online course can be done pretty much any way you want. They’re delivered as videos most commonly these days, but you can do them as audio files or e-books instead. You can send them as emails, do instant downloads of the files, set up a website that hosts the content, or set up on a platform like Teachable or Thinkific. There are many options available now for how to deliver course content, so you can choose whatever you’re most comfortable with.
You can opt to do something small, say 3-4 modules, units, classes, or whatever you want to call them, up to something large, say 8-12 modules/units/classes. You can charge $50 or $5,000. The upside of online courses is that they seem to be the way to make the most money from passive income because you can charge a lot more than you would charge for an e-book. Even when what you’re teaching may be exactly the same! A course is seen as having more value than an e-book, and that alone allows you to be able to charge more.
BUT you don’t want to just slap something together and expect people to pay a thousand bucks for it. OF COURSE you have to provide something valuable. Generally, the more you charge, the more you need to provide. This means more actual content, as well as more ways to deliver the content. You also have to include extras with your courses that will help people use your course, things like worksheets, slides, and printables. Another included extra with a lot of courses, especially larger courses, is the ability for students to interact with one another - currently, private Facebook groups are all the rage, but you can create any kind of private forum or message board just for people who sign up for the course.
You can also choose to drip out content so people get access over time, let people get access immediately with instant downloads of the content, have specific start and end times, or let people take the course in their own time. You can choose to add in a testing structure or a way for people to graduate or get a certificate of completion using a platform like ClassMarker.
When you have an email list, it becomes much easier to market your online course since you have a group of people who are already interested in you or your niche, but you do have to put in more effort to promote your course compared to selling an e-book.
You may be interested in selling an online course but are unsure of what you should focus on. Again, when you’re starting, start small. It’s often easy to go big but then you become so overwhelmed and in over your head that you give up before you finish, or you end up with a product that isn’t up to snuff. You can use books available online and their reviews to help you find course ideas, popular blog posts and their comments, and what other courses are out there already in your niche. Even if someone else is doing a course you’d like to do, that doesn’t mean you have to scrap your idea. Can you do it in a different, better way? Only you have your perspective and way of doing things, so it’s not totally the same, and you can jive best with your audience.
Subscriptions & Memberships
A subscription is when someone signs up for something ongoing, and they pay at regular intervals, usually once a month, and the get content at regular intervals. A membership is similar to a subscription in that it’s recurring revenue that people pay month after month. The difference is that with a membership, they usually sign up for a membership area, and it’s a group focused on something in particular. An online membership can be like an in-person one, just online!
For a subscription or membership, you’ll need to figure out what you’re going to offer. What will they get regularly? It’s tempting to want to throw in a zillion things, but people usually don’t use them. But you still need to give some value, otherwise people will unsubscribe. Churn rate (the rate that people leave) can kill your subscription early. You want to keep it as low as possible! Otherwise your subscription or membership will dwindle down to zero fast. Creating weekly content tends to be most common for your subscribers.
An average churn rate is around 10% per month (so 10% of people cancel each month; so if you’ve got 100 subscribers, 10 drop off the first month and bring you down to 90, 9 drop off the second month and bring you down to 81, etc). If your churn rate is higher than 10%, you may need to scrap the subscription! You’ll want to sign up more people to the subscription than leave to make up for the people who cancel (so if 10 cancel each month, you want to sign up more than 10 each month). If you can’t get more to sign up than leave, then you may have to scrap the subscription!
Subscriptions and memberships are fantastic for recurring revenue, which is revenue that you make regularly, where people pay at set intervals over and over again. When you’re selling products, there is often a feast and famine cycle where you launch something and make a bunch of money during that launch (feast) and then don’t make much money afterward (famine) until you do another launch, and it repeats and repeats.
The way to stop this is usually with recurring revenue. It’s money you know is coming month after month. This is great because it gives you a little peace of mind so you can focus on delivering great content that you’re really passionate about. But obviously, it’s not easy! And generally not something you can accomplish without an audience. It’s harder to get someone to sign up for a subscription or membership than for something they pay for once (even if that once is a lot more money).
Physical Products & Subscription Boxes
You may prefer to offer physical products instead of something online. Physical products are also limited to a degree though, like readings/consultations (as one person, you can only create so many of one thing, but you could hire others to create more). You’ll generally want to create products that are related to whatever you do so they’ll appeal to the same audience you already have. If you create small quantities, you may be able to just sell the physical items to your email list and not put together a big storefront. This can save a lot of time and energy!
If you’re not going to produce small quantities, then you will likely need a storefront. Shopify is probably the most common one used now. You do have to consider things like sales taxes, shipping costs, and how to ship internationally if you’re going to sell physical products. That can get complicated, especially the taxes part, so you may want to consult with a tax professional in your area to make sure you get it right.
Subscription boxes gather small items together and ship them to subscribers each month. Subscription boxes are another physical product option, except you’re not usually the one creating the items. Instead, you find sellers and work with them to include their items in your box. You have to be comfortable reaching out to people and negotiating prices - keeping the cost low is very important with subscription boxes, otherwise you’ll have to charge too much in order to make a profit.
Subscription boxes usually have 3-6 small items in each, and ship out once per month. You find new items every month for the boxes. You can come up with an overall theme for your subscription box, and specific themes for each month. Having a cute box - the actual box itself! - can be of help for attracting people to your box.
Cratejoy has a guide to creating a subscription box you can read here: https://www.cratejoy.com/sell/guides/how-to-start-a-subscription-box/
Subbly also has one here: http://www.subbly.co/blog/start-a-subscription-box-business/
Lesson 2: Anatomy of a Sales Page
People tend to find putting together a sales page intimidating, but once you kind of get the formula, it’s actually fairly simple. Lower-priced products can have shorter sales pages, and higher-priced products have longer sales pages. Basically, the higher the price, the longer the sales page!
It helps to think of your sales page in sections, and you can tackle each section one-at-a-time, filling out the necessary information. There will be less sections for a lower-priced product (and you can combine some), and more will be added in as the price increases. The sections are:
You don’t have to do them in this exact order, and can mix them up as needed. Some may be duplicated too (like testimonials, there will usually be a few testimonials sections for higher-priced products and services). Lower-priced products and services usually won’t have all of these sections (like testimonials usually aren’t needed for something under $50).
To make it clear for you, I’ll outline some of my own sales pages for you! I’ll start with a low priced product, AstroLove, which is a mini course focused on love and relationships I’ve sold for $17 (very low!). So this is the top of the of the sales page:
It helps to think of your sales page in sections, and you can tackle each section one-at-a-time, filling out the necessary information. There will be less sections for a lower-priced product (and you can combine some), and more will be added in as the price increases. The sections are:
- Headline (this is basically always the first section; it can be just one line)
- Frustrations (addressing the frustrations they may have that your product/service can help with)
- Potential results (what they can ultimately get out of it, how it benefits them)
- Your offer itself (describing what’s in your product or service, what they can expect, the cost, a guarantee if you’ll offer that)
- Testimonials (from people you’ve already helped)
- About you (so they can be confident you’re qualified to help them)
- Why you’re offering this (helps them understand you and the product/service better)
- Why it’s for them & a good time for it/why it’s not for them (sort out who would benefit and who shouldn’t get the product or service)
- Objections (think of the reasons why they may think they can’t but should)
- FAQ (your frequently asked questions; if it’s the first time, then think of questions that people may ask you, like technical questions, delivery, payment methods, refund policy, etc.)
- Buy/signup (places to get your offer or service on the sales page)
You don’t have to do them in this exact order, and can mix them up as needed. Some may be duplicated too (like testimonials, there will usually be a few testimonials sections for higher-priced products and services). Lower-priced products and services usually won’t have all of these sections (like testimonials usually aren’t needed for something under $50).
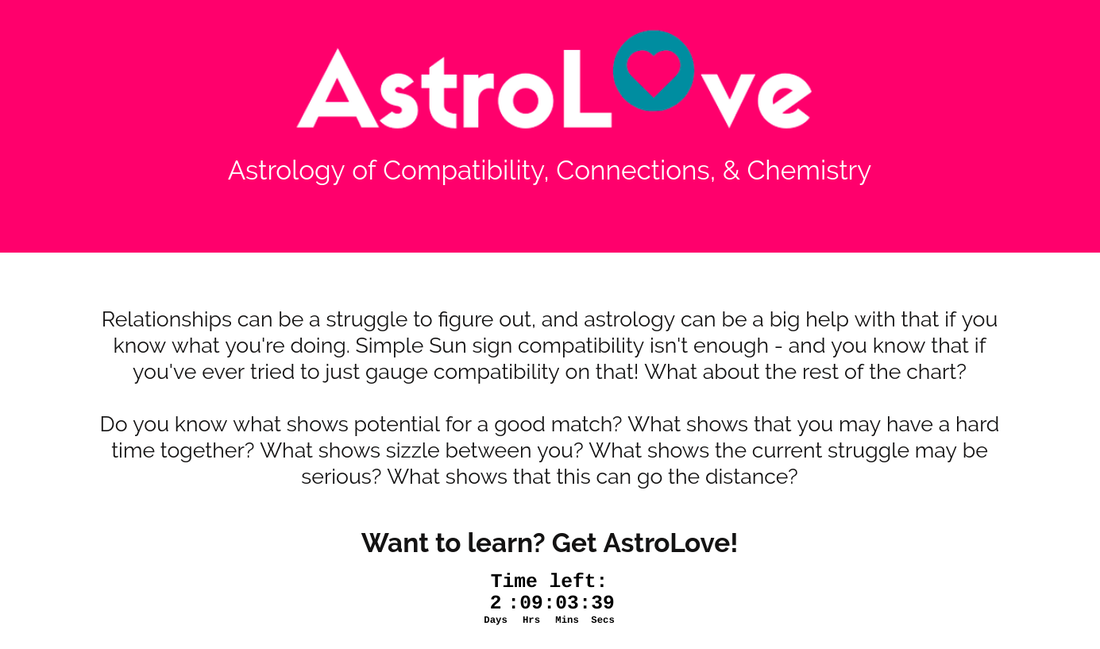
To make it clear for you, I’ll outline some of my own sales pages for you! I’ll start with a low priced product, AstroLove, which is a mini course focused on love and relationships I’ve sold for $17 (very low!). So this is the top of the of the sales page:
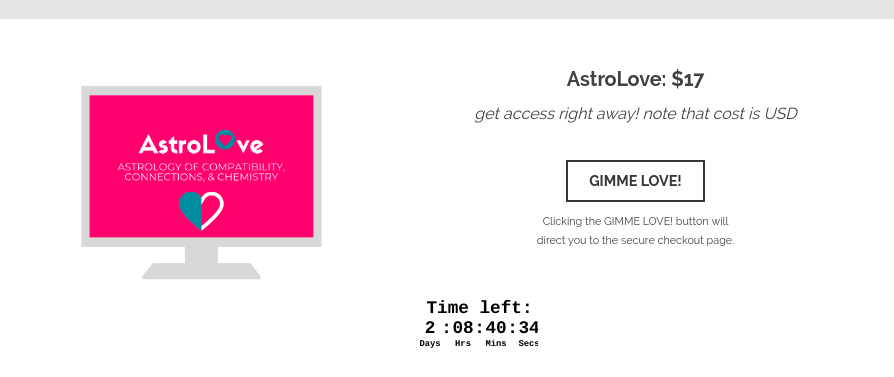
The header just has the name of the course (AstroLove: Astrology of Compatibility, Connections, & Chemistry) since the subtitle really says what it is simply. It then quickly throws out frustrations (using Sun sign compatibility isn’t enough to gauge compatibility) and potential results (knowing how to determine a good match, hard time, sizzle, struggle, this goes the distance).
You’ll see there’s also a timer showing how much time is left to buy (if you’re doing a limited-time launch, then it’s a good idea to add timers to your sales page; this one was actually made using a free website countdown timer creator that’ll generate the HTML code for you to add to your site; you can use it yourself here: https://www.timeanddate.com/clocks/freecountdown.html).
Next:
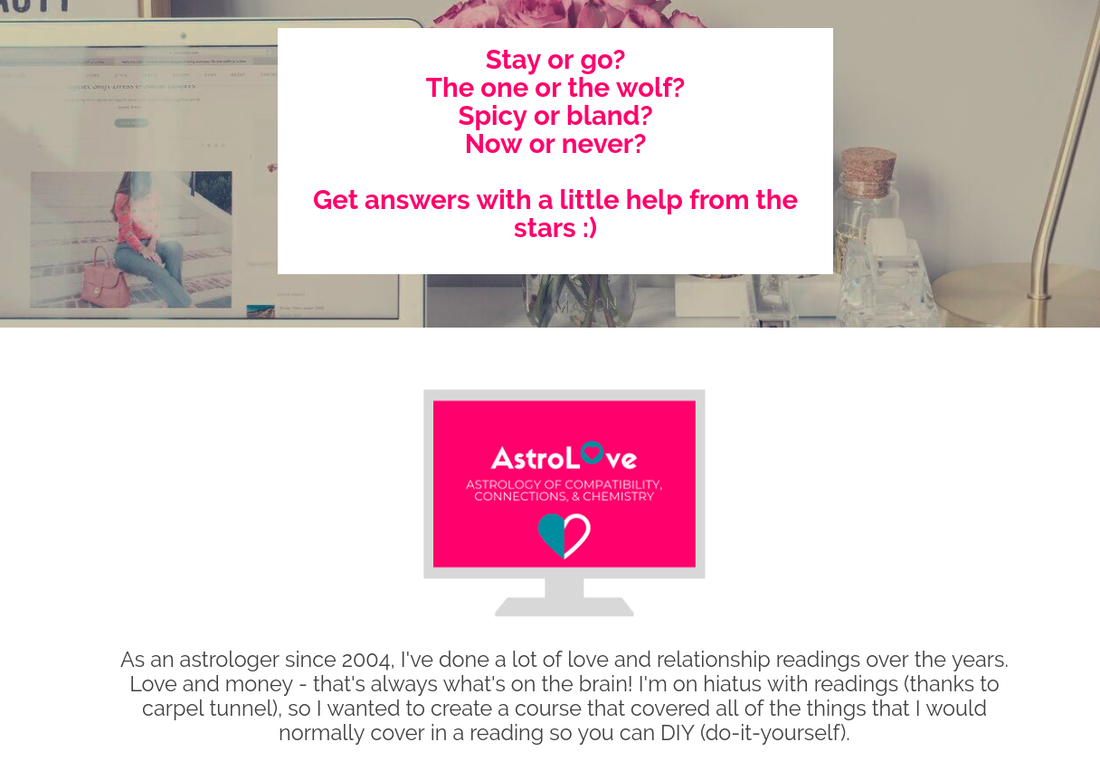
The next section quickly lists questions people have in their head about a relationship that they can answer using astrology (should I stay or go? Is he the one or the wolf in sheep’s clothing? etc.), which is basically a form of potential results. Then comes a little bit on why I’m offering it (since I’m on hiatus from readings).
Next:
Next:
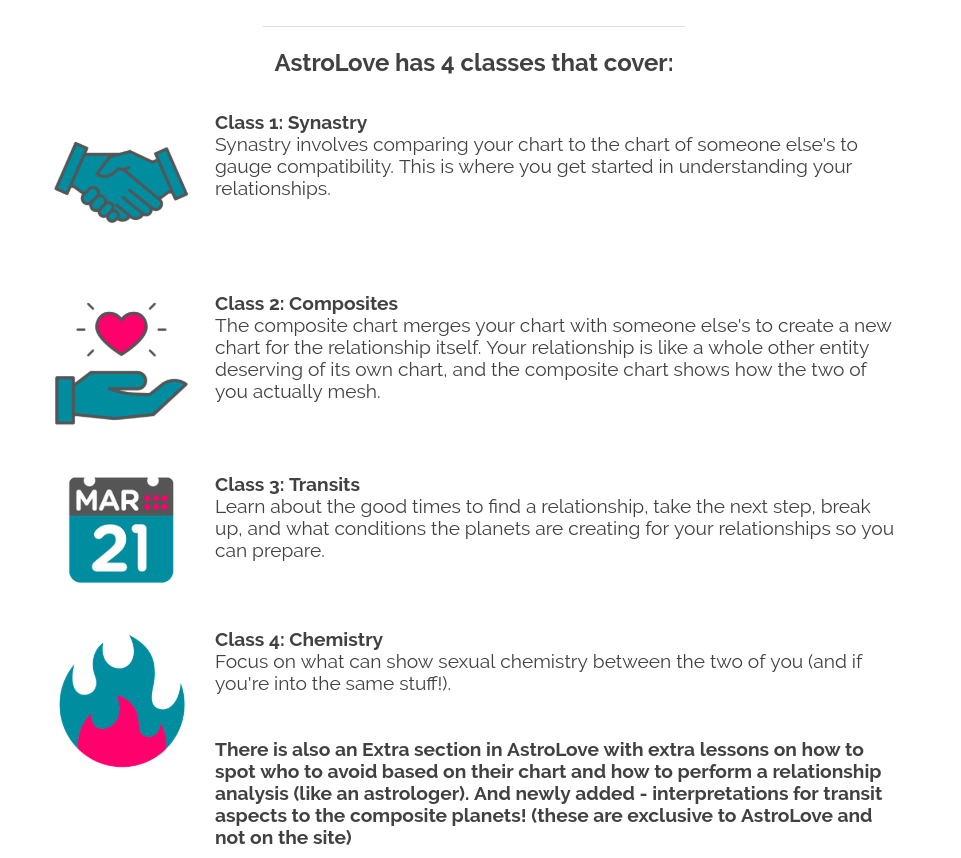
Now it’s outlined what is covered in the course. Each class is separated with a little info, and with its own icon. Having images/icons helps break up the text, making it easier for people to read (though make no mistake, there will be people who don’t read it! LOL!). The blue and pink used in the icons are the same blue and pink in the AstroLove cover and header (keep it cohesive!).
Next:
Next:
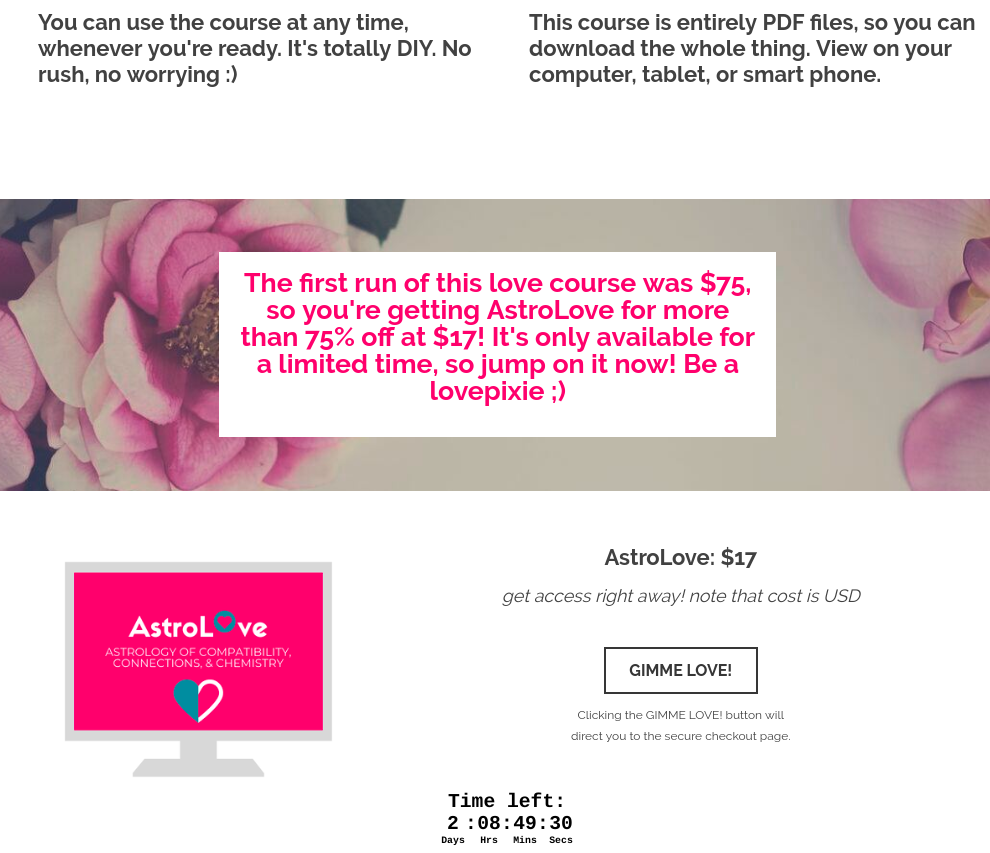
Then I quickly pump out a few of the objections people might have: but I don’t have the time right now (you can use the course at any time), but what if I need a break (it’s DIY, no rush), but I don’t want to sign up for anything (you can download the whole thing), but I want to view it on my computer/tablet/phone (you can view on your computer, tablet, or smart phone). Then comes a section to buy with another timer. You’ll see the buy button doesn’t say ‘Buy” or ‘Buy now’ - that’s generally not going to work as well! You’re better off changing the wording of your buy button to something else that fits more of what you’re selling and is highly active. Since this is a love course, I went with GIMME LOVE! (who doesn’t want love? Well me but that’s another story for my shrink).
Next:
Next:
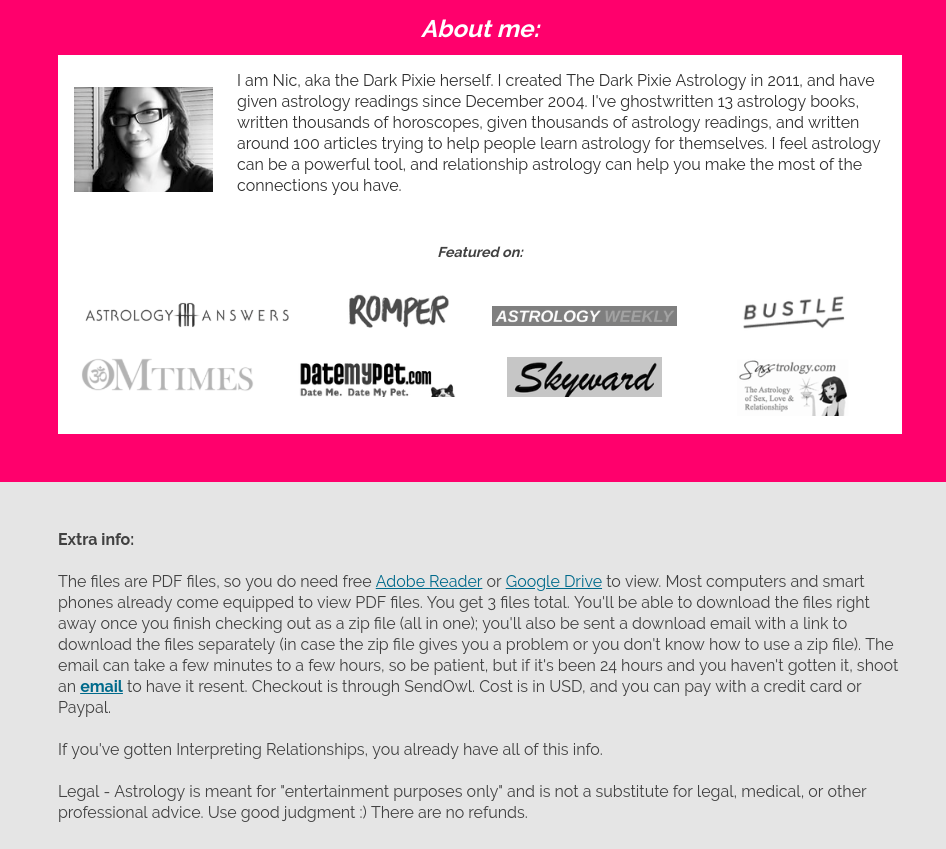
Then comes the about me section with a little about my background (if you’ve been featured anywhere, it helps to include the logos!). And then comes technical info, and this is basically in place of an FAQ (so instead of a full FAQ, since this is a lower-priced product, it’s just a quick outline of basic technical info).
Below that is just another section to buy that’s identical to the first:
Below that is just another section to buy that’s identical to the first:
You’ll usually want to have at least 2 places to buy on your sales page (for longer pages for higher-priced products/services, it may be more like 5-8!).So it basically went:
Headline
Frustrations + potential results
Questions (potential results)
Why I’m offering
What’s in the course
Objections
Buy
About me
Extra info (FAQ replacement)
Buy
If you check out the sales pages for the classes that are always available like Get Started With Predictive Astrology, you’ll see a very similar outline. Not too scary, I hope!
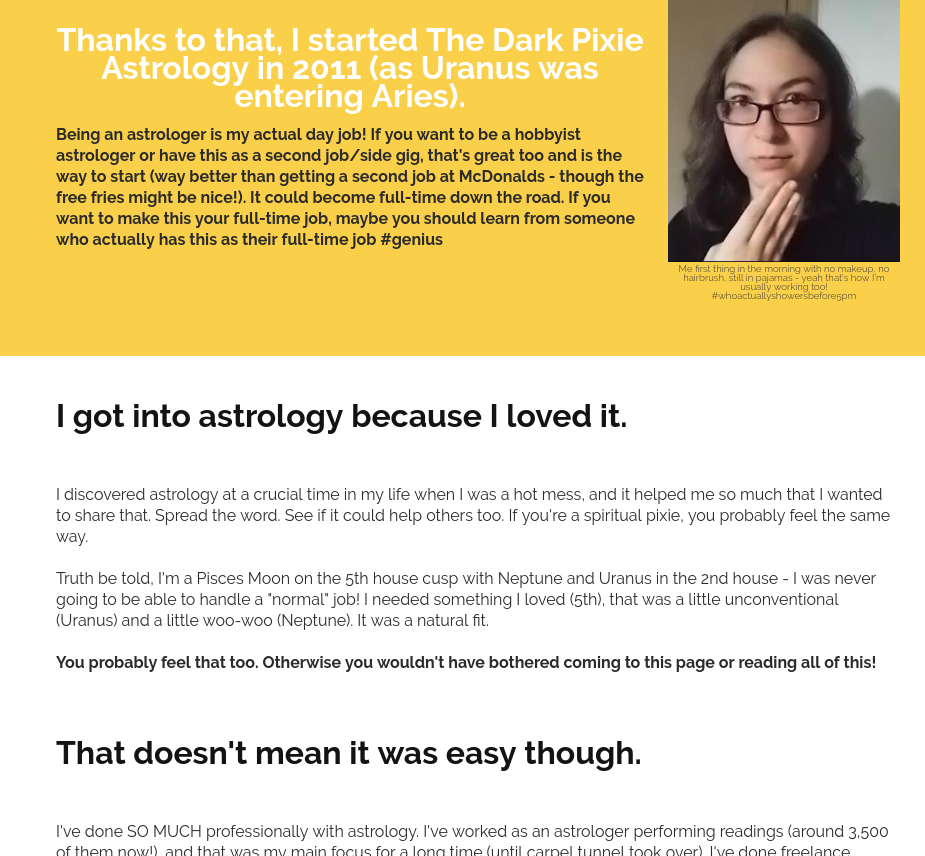
Now I’ll outline the sales page for Professional Pixie (higher-priced = longer). Header:
Instead of just the name of the course, I went with an inspirational headline. Then:
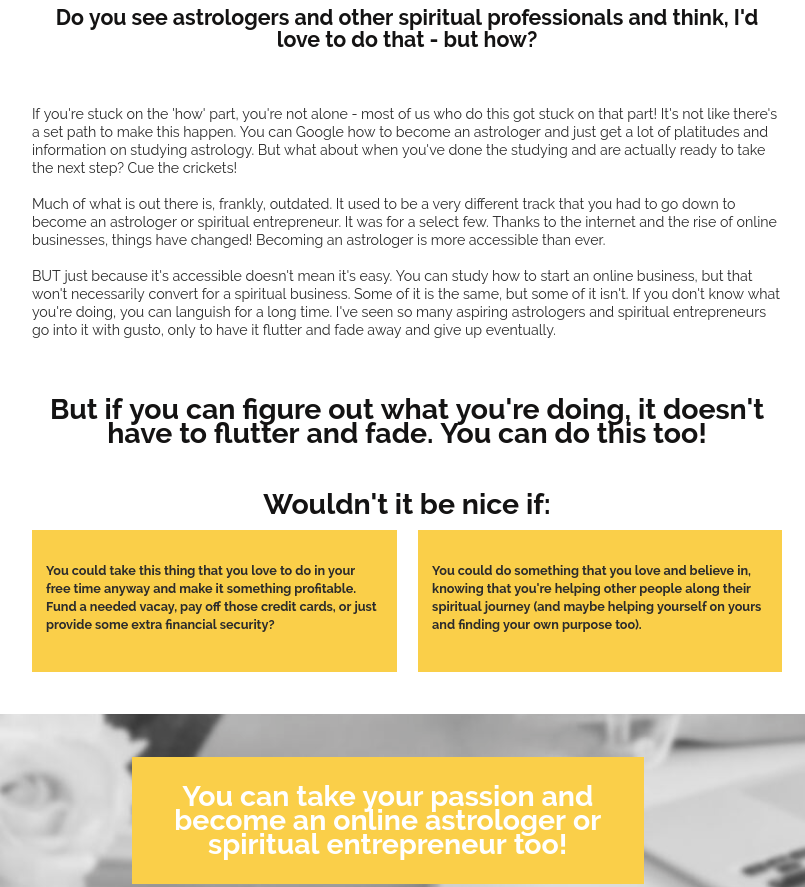
This section focuses on frustrations (uncertainty about how to become an online astrologer, feeling stuck, using outdated advice), and then potential results (wouldn’t it be nice if: - this is actually an easy way to highlight potential positive results from your product or service! Finish the sentence: wouldn’t it be nice if . . .).
Then we have some objections:
Then we have some objections:
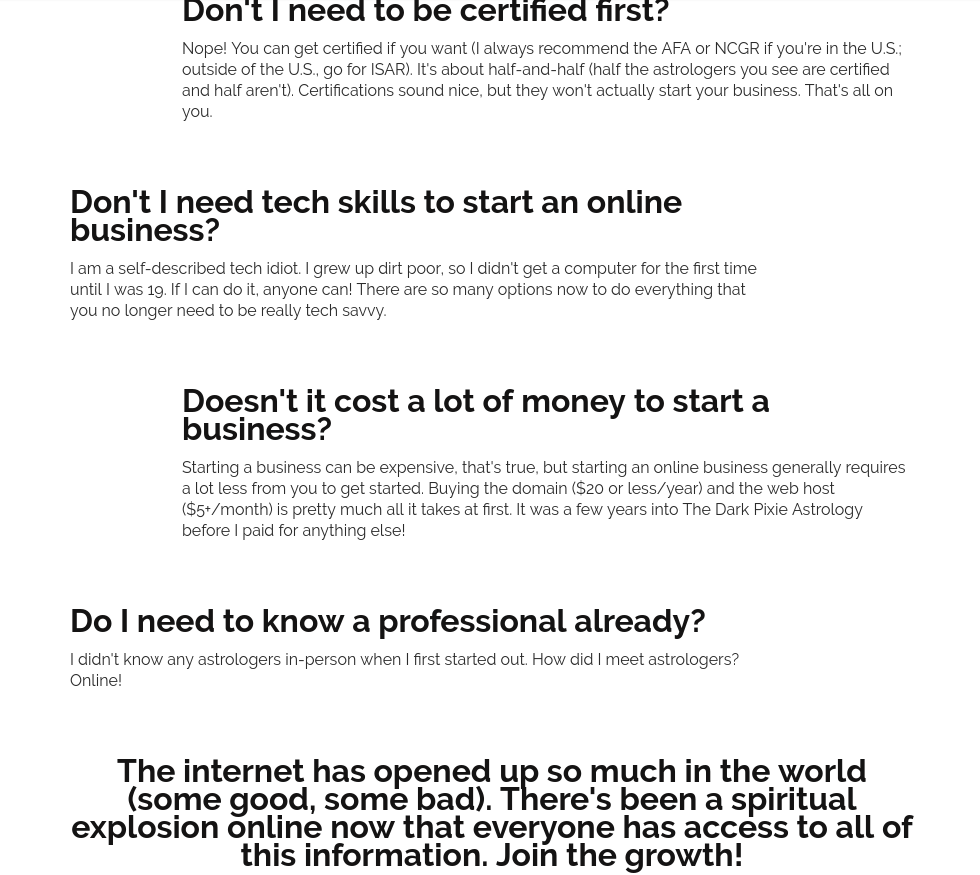
Address some of the biggest objections people may have right off of the bat. What may some of those objections look like for your product or service?
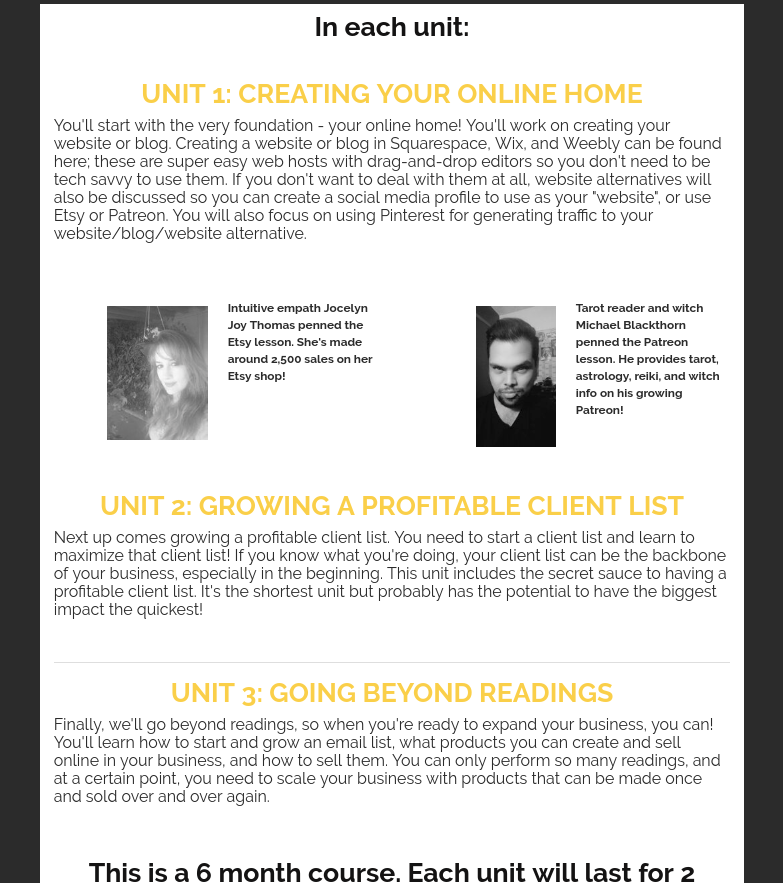
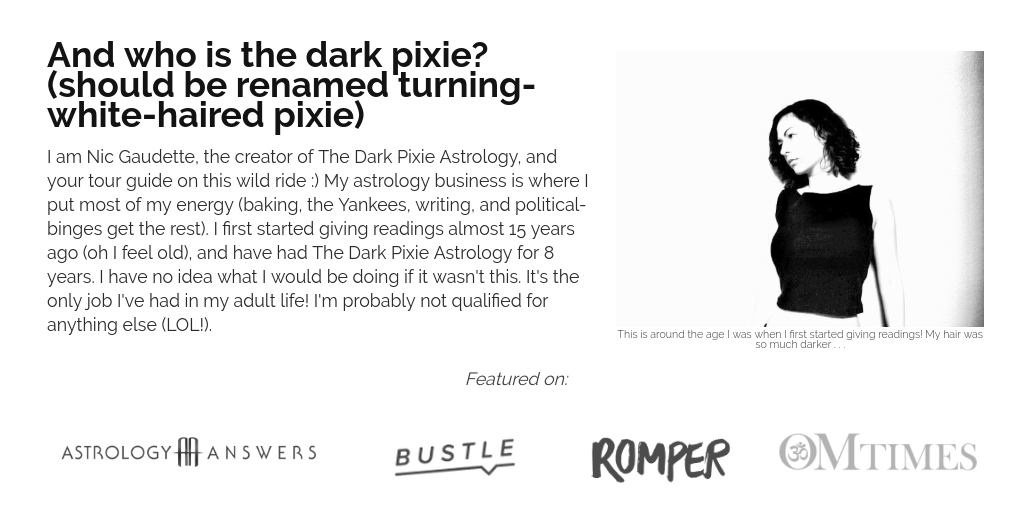
Then it goes into me and my history:
Then it goes into me and my history:
This shows why someone should learn from me; it’s a form of the about you section, but you can go more into your own back story and show why it is you would be the best person to offer the product or service.
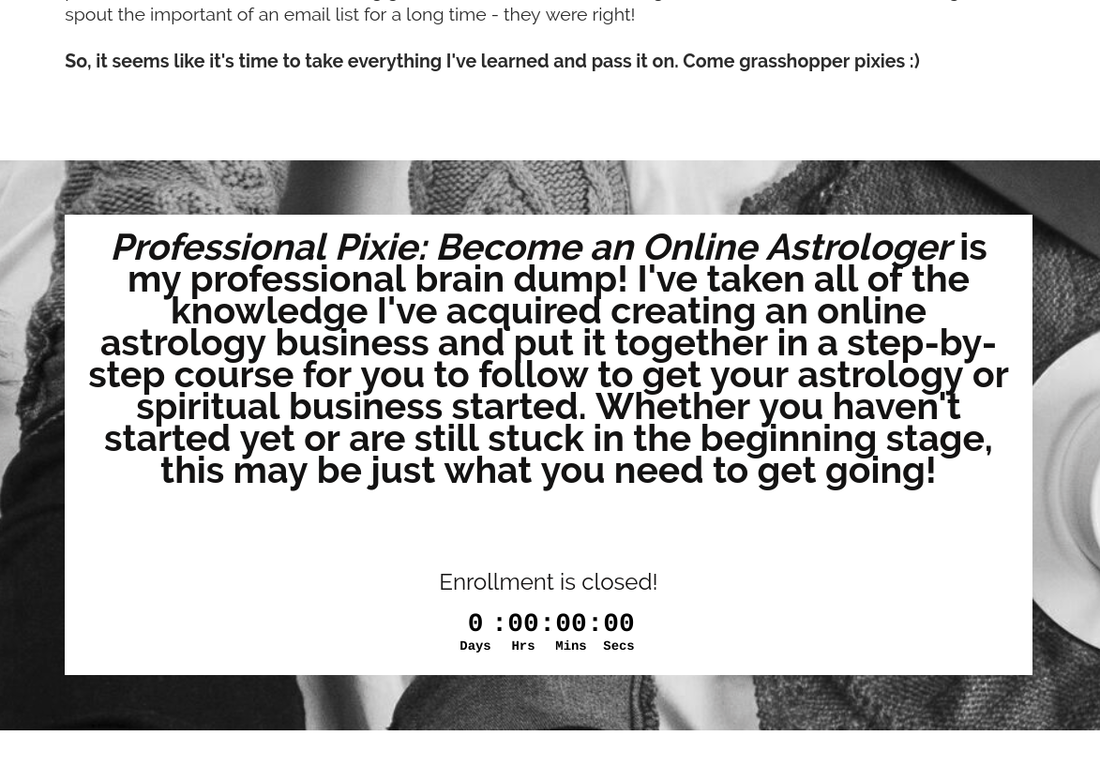
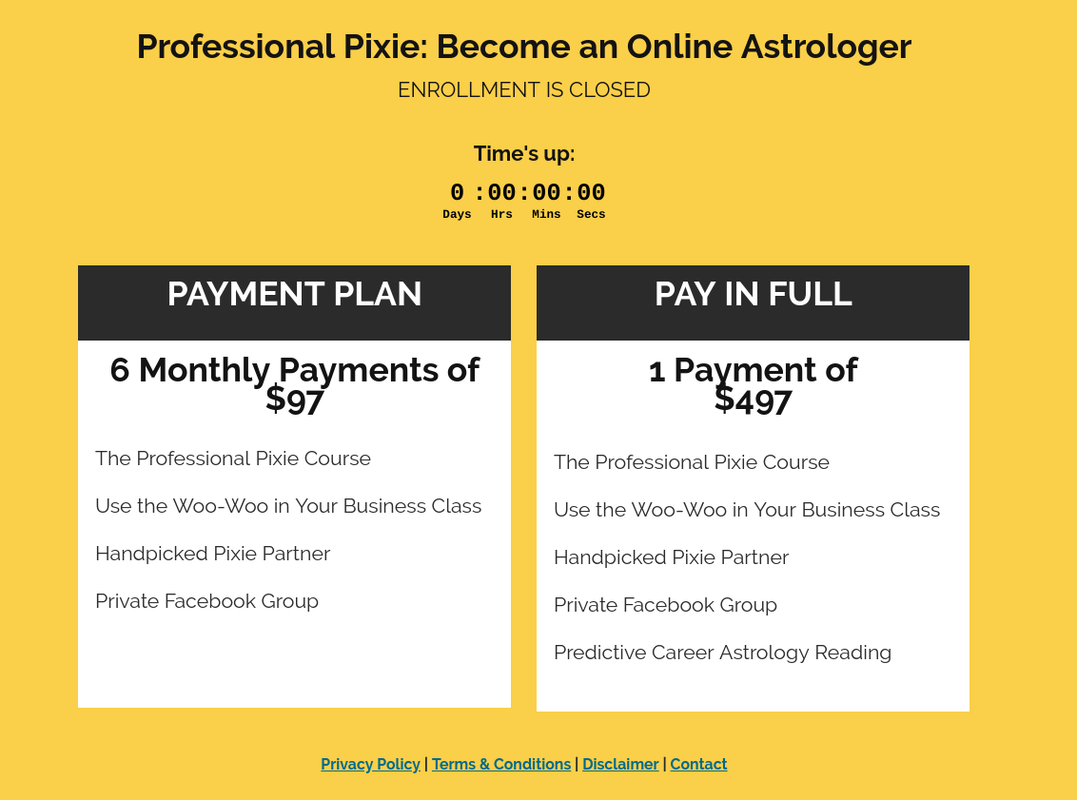
Then comes a buy section:
Then comes a buy section:
There’s no buy buttons in this pic since the course wasn’t open! But there were 2 buy buttons, one for the payment plan option and one for the pay-in-full option. And you can see a countdown timer here as well.
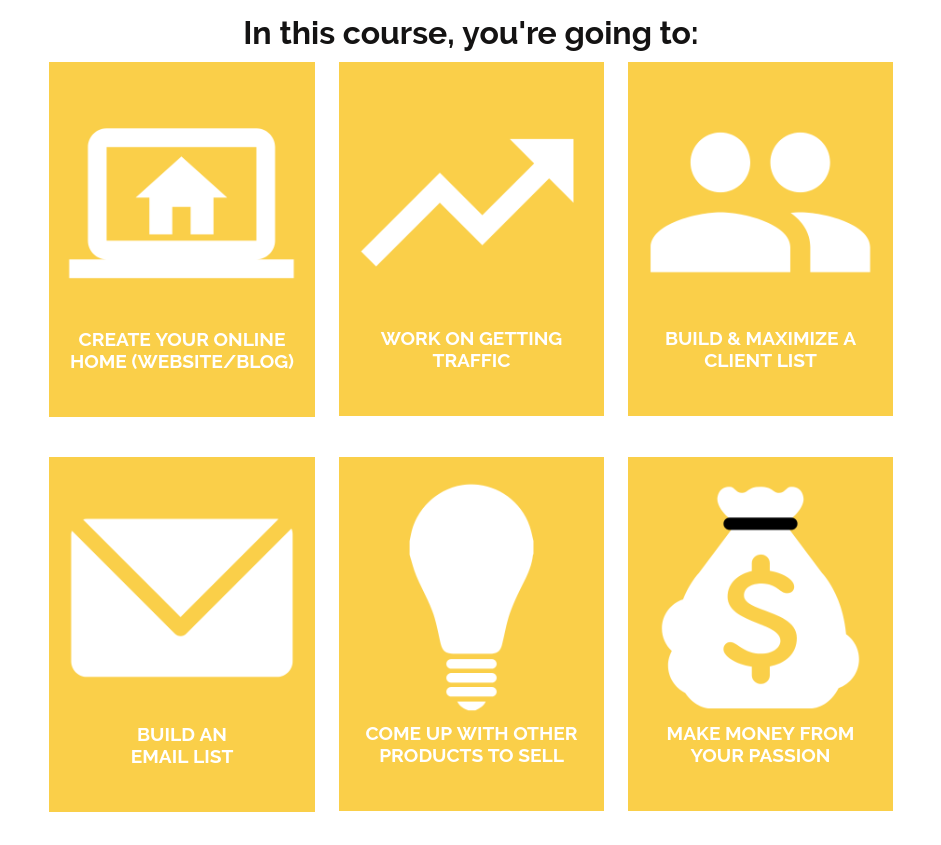
Then comes the outline for what’s in the course:
Then comes the outline for what’s in the course:
(if you’re doing a course, it helps to have an area saying, “In this course, you’re going to . . .” and outline; use images/icons where you can to break everything up, like with AstroLove)
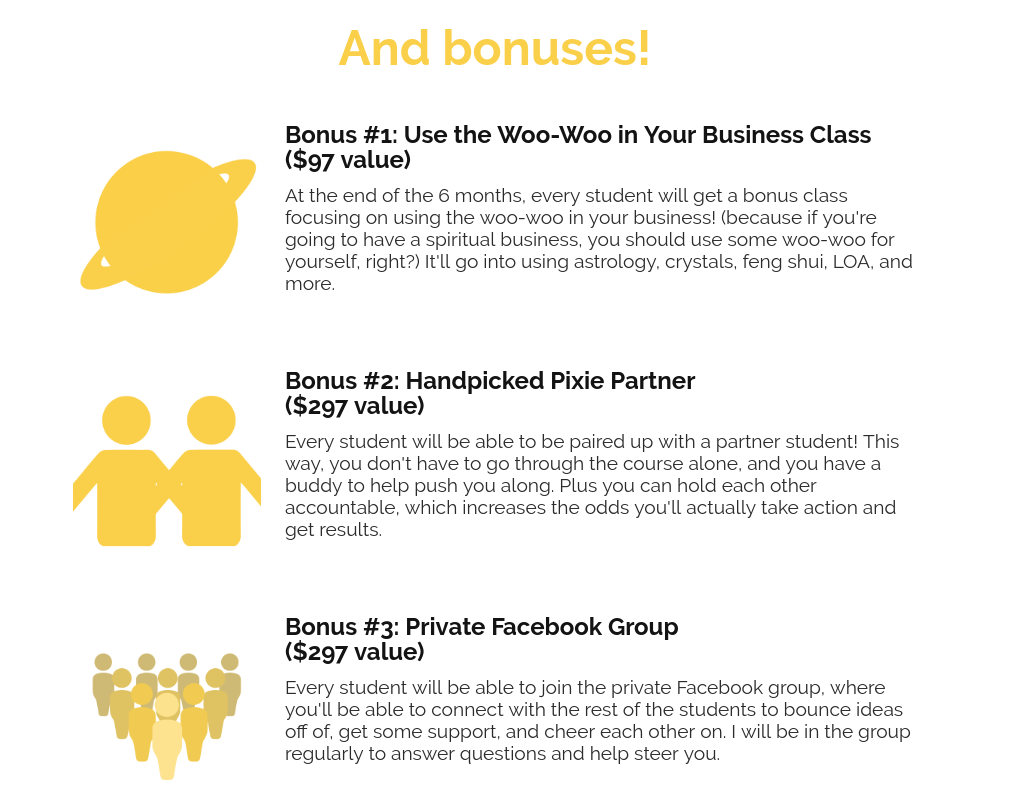
Then outline any potential bonuses with your offer:
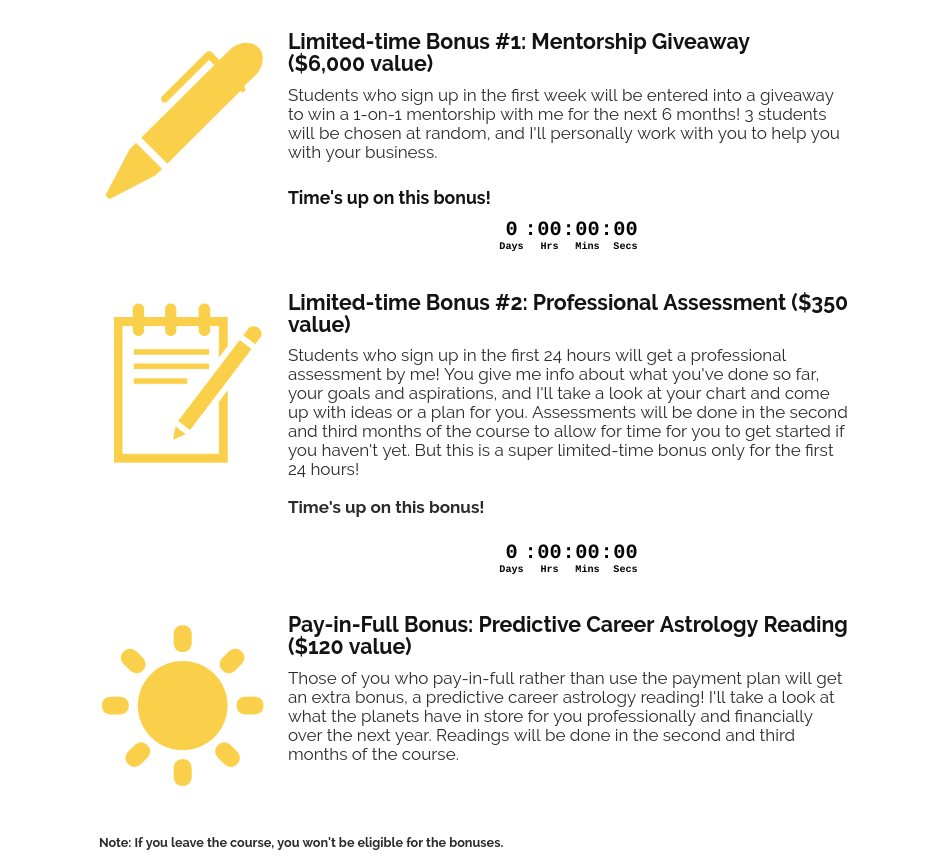
And for larger product offers, you’ll also want to consider limited-time, limited-number, or pay-in-full bonuses:
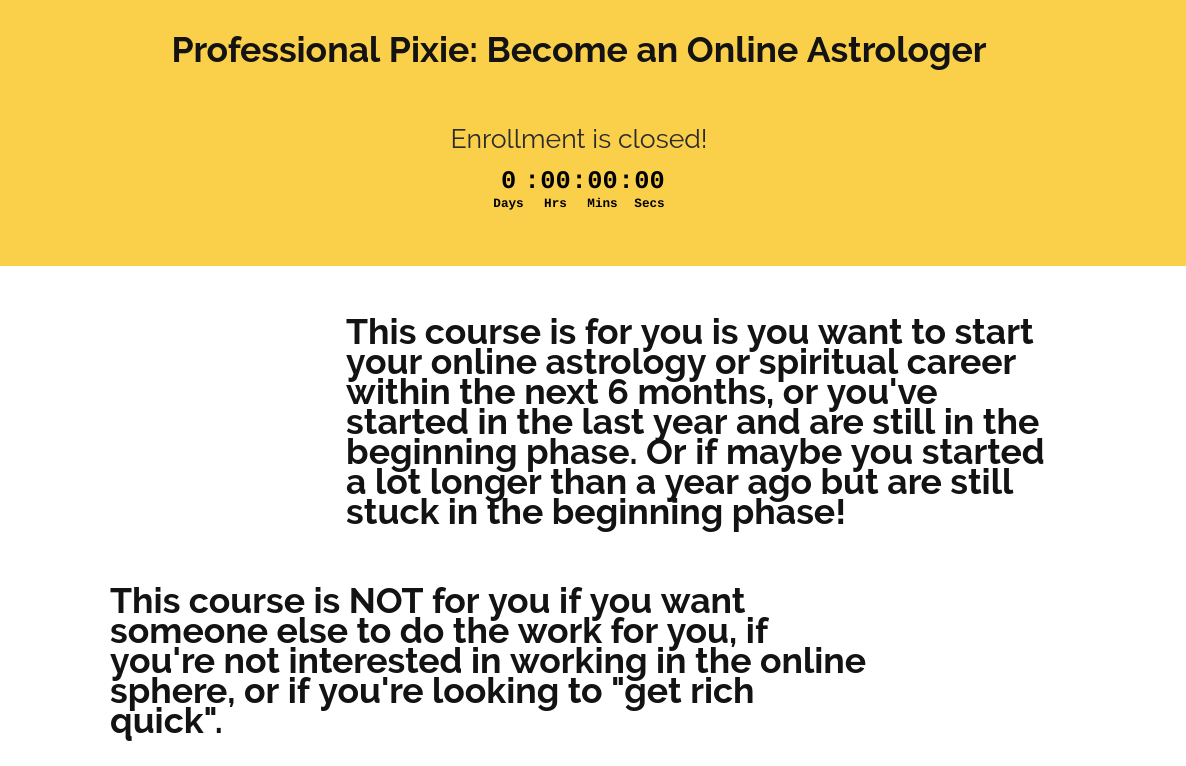
Then there’s another buy area (again no buttons but it was above the countdown), as well as a why it’s for you/not for you section (which you’ll want for larger products):
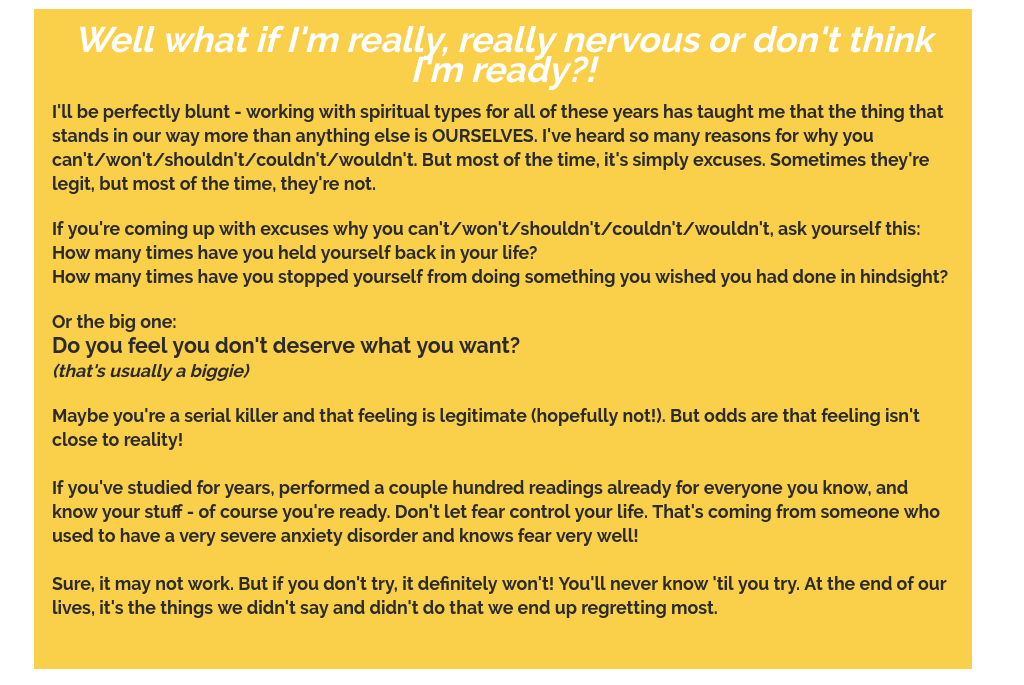
Then another objection section:
More about me:
Refund policy (this also had buy buttons):
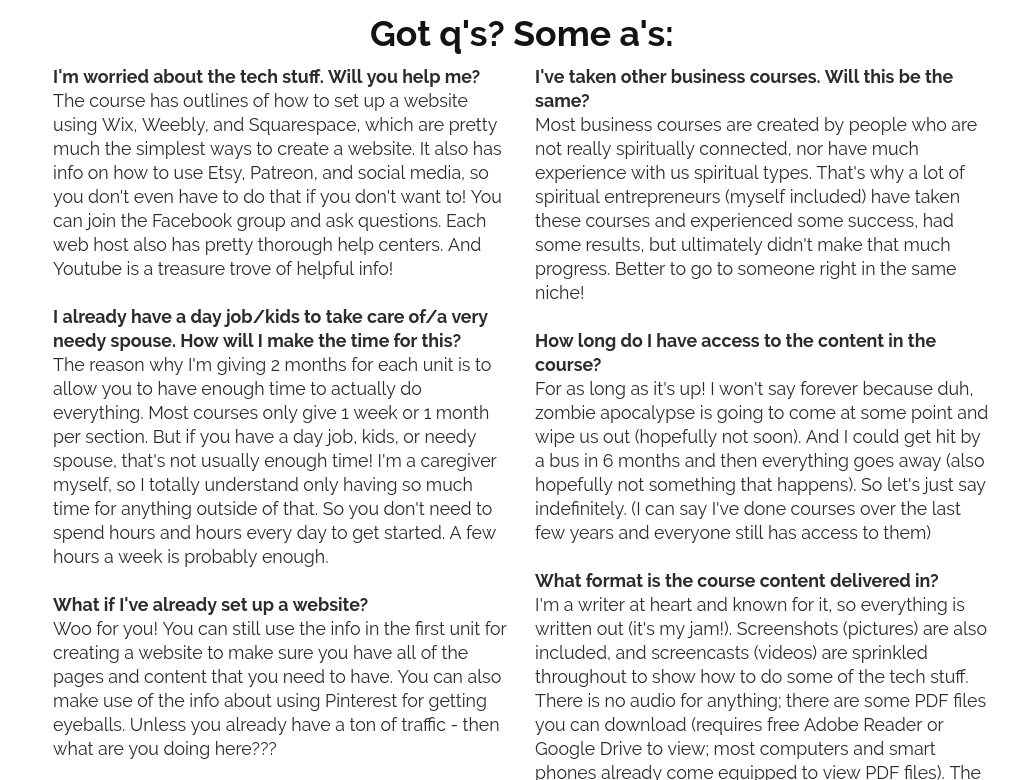
Then FAQ (real one not the technical info one from AstroLove; you’ll want a full FAQ for larger offers):
And then a final buy section (again no buttons but there were with each option):
So it went like this:
The only thing that was missing was testimonials because it was the first time; if it’s the first time you’re offering something, a good replacement for testimonials can be experts singing your praises (so if you know any other experts in your niche who can offer some words of praise for you, you can ask them to and include that on your sales page; make sure to only ask the ones you have a personal relationship with and who are familiar with your work, otherwise it’ll be annoying to the ones you don’t know and disingenuous if they haven’t seen you in action). I was going to but wound up not having the time to do that!
You’ll pretty much always want to start with the headline and end with a buy section. But you can play around in the middle with the order of the rest!
- Headline (inspirational)
- Frustrations
- Potential results
- Objections
- Why learn from me (about you)
- Buy
- What’s in the course
- Buy
- Why it’s for you/not for you
- Objections
- More about me
- Refund policy with buy
- FAQ
- Buy
The only thing that was missing was testimonials because it was the first time; if it’s the first time you’re offering something, a good replacement for testimonials can be experts singing your praises (so if you know any other experts in your niche who can offer some words of praise for you, you can ask them to and include that on your sales page; make sure to only ask the ones you have a personal relationship with and who are familiar with your work, otherwise it’ll be annoying to the ones you don’t know and disingenuous if they haven’t seen you in action). I was going to but wound up not having the time to do that!
You’ll pretty much always want to start with the headline and end with a buy section. But you can play around in the middle with the order of the rest!
Lesson 3: Creating Mockups for Sales Pages
When you’re putting together a sales page, you’ll want to add some images. You can use the frame in Canva for quickie mockups (outlined in my secret sauce image lesson). But you may also want to create mockups of real photos of your products in use. You can do that too! (and free and easy!) Check out this image:
This is a mockup I created, and it’s really simple! I used an image I found on Unsplash (images on Unsplash can be used for free without attribution, even for commercial uses, as yours would be). This is the original image:
You can see that everything’s the same, and all I had to do was add the cover image. You can search on Unsplash for any image of a desktop monitor, laptop, or smart phone to use. Just make sure the screen isn’t being blocked by anything (like a hand or someone’s head or finger). Unobstructed screen! This is a flatlay image (an image taken from directly above), and that’ll give you a nice flat screen. But choose whatever you want!
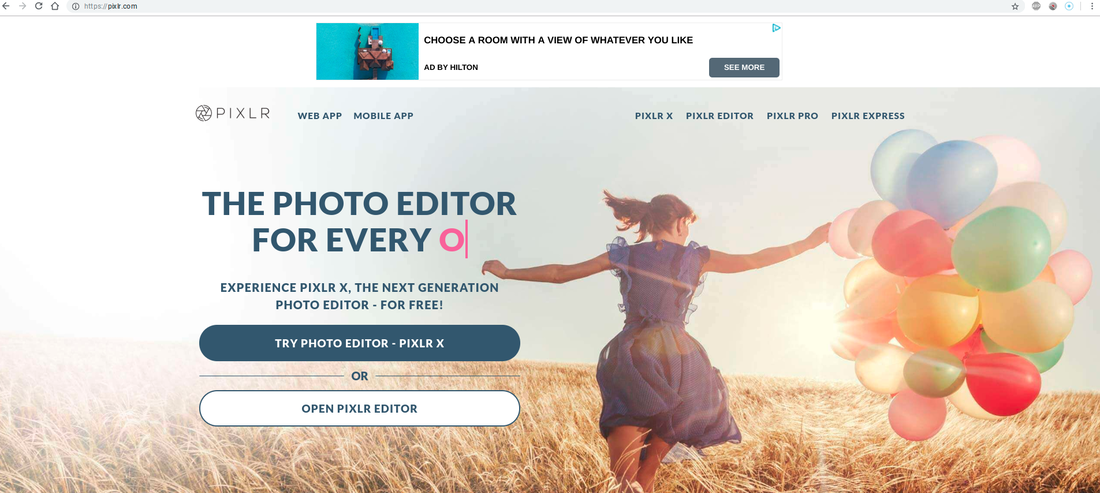
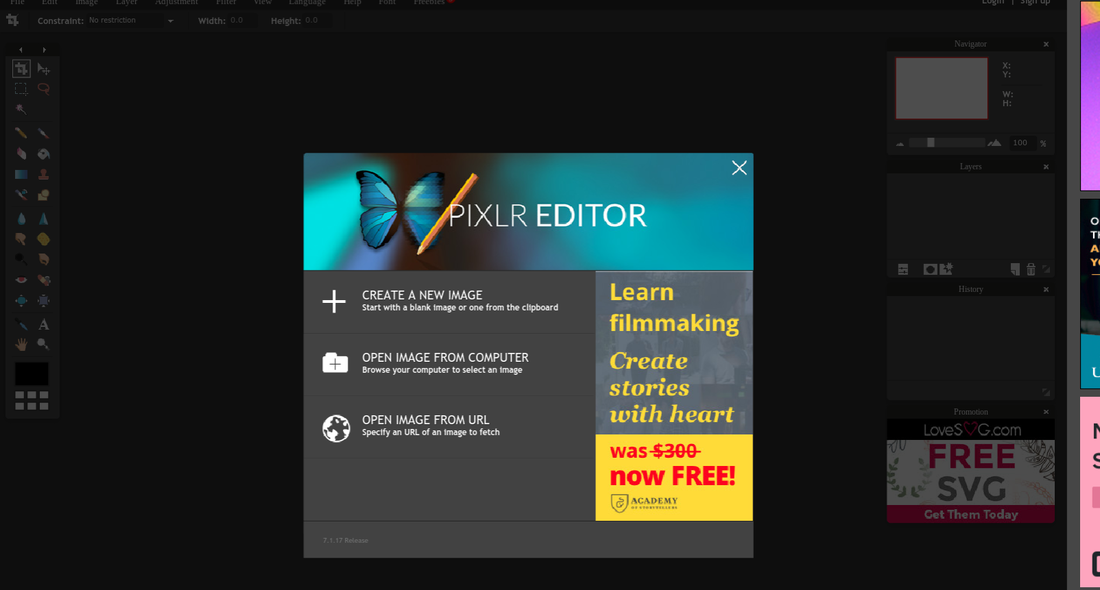
Then you’re going to use Pixlr to add the image to the screen. Pixlr is a free online photo editor. Go to https://pixlr.com/ and open the Pixlr Editor:
Then you’re going to use Pixlr to add the image to the screen. Pixlr is a free online photo editor. Go to https://pixlr.com/ and open the Pixlr Editor:
It’ll give you the option to create a new image, open an image from your computer, or open an image from a URL:
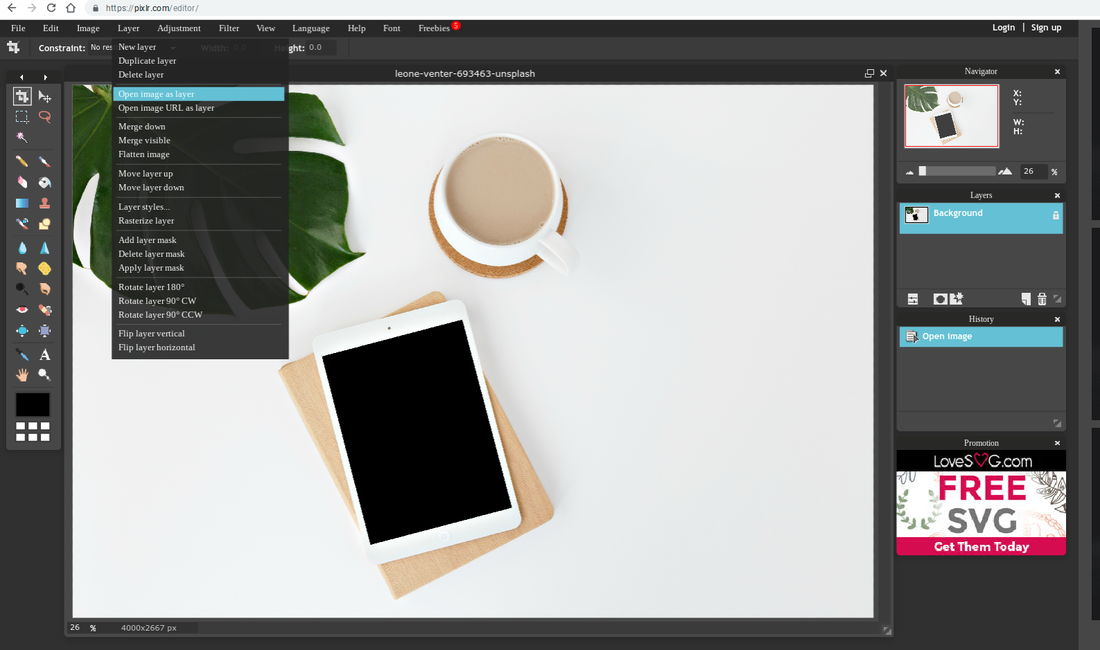
I download the image from Unsplash so opted to open an image from my computer. Once you’ve opened the image, then click on Layer > Open image as layer, to upload the cover image for the screen:
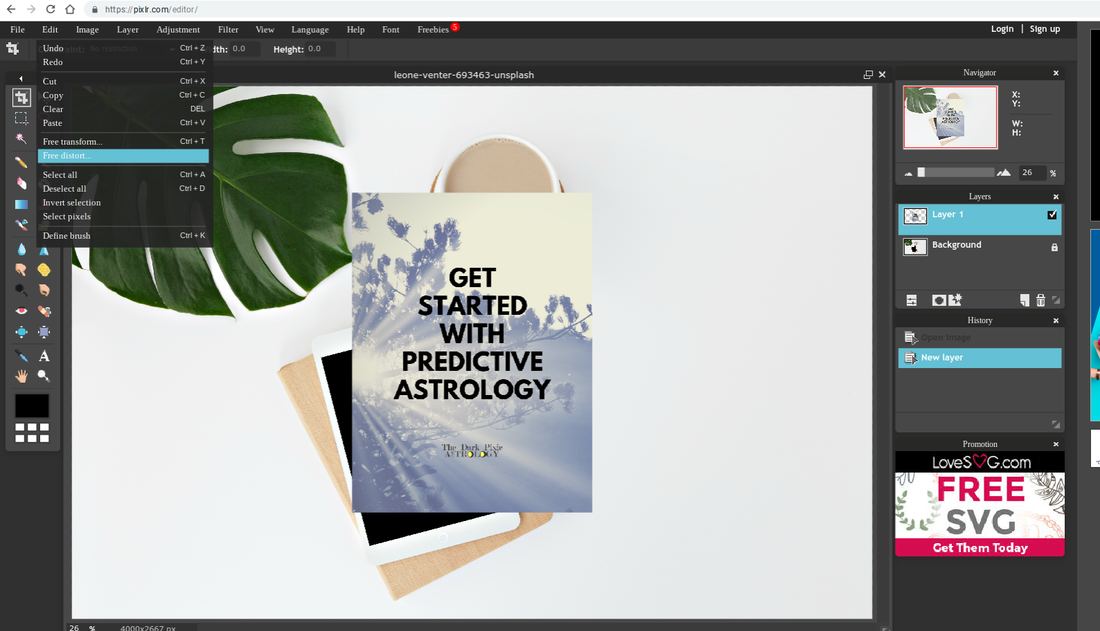
Once uploaded, click on the image, then click on Image > Free distort:
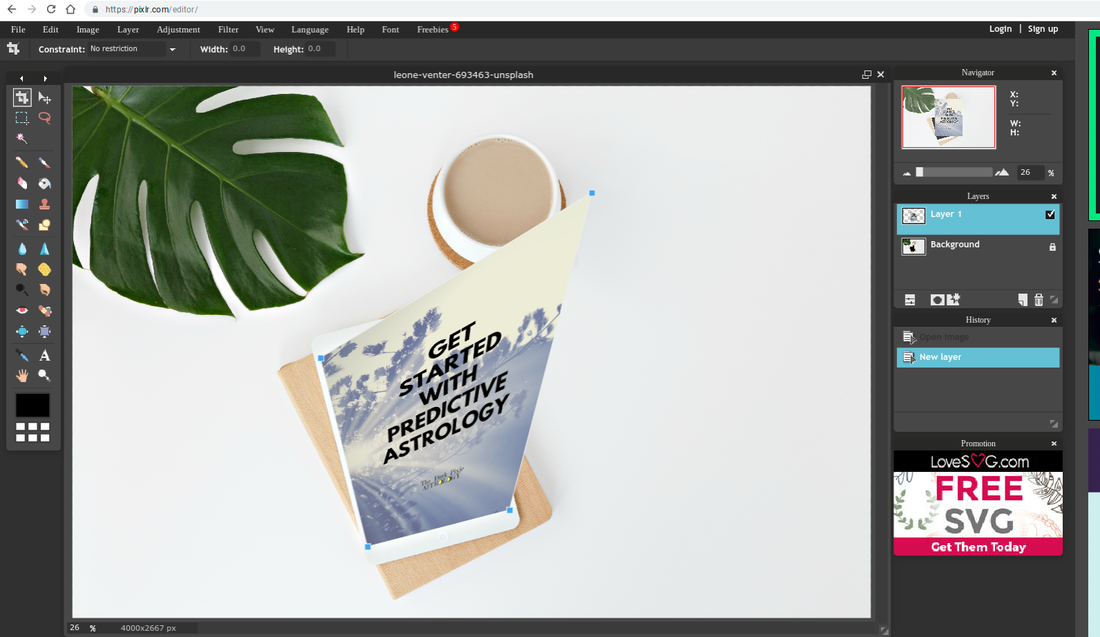
Little blue squares will appear in every corner of the image. This allows you to drag the corners of the image to wherever you want, which in this case will be to the screen of the tablet:
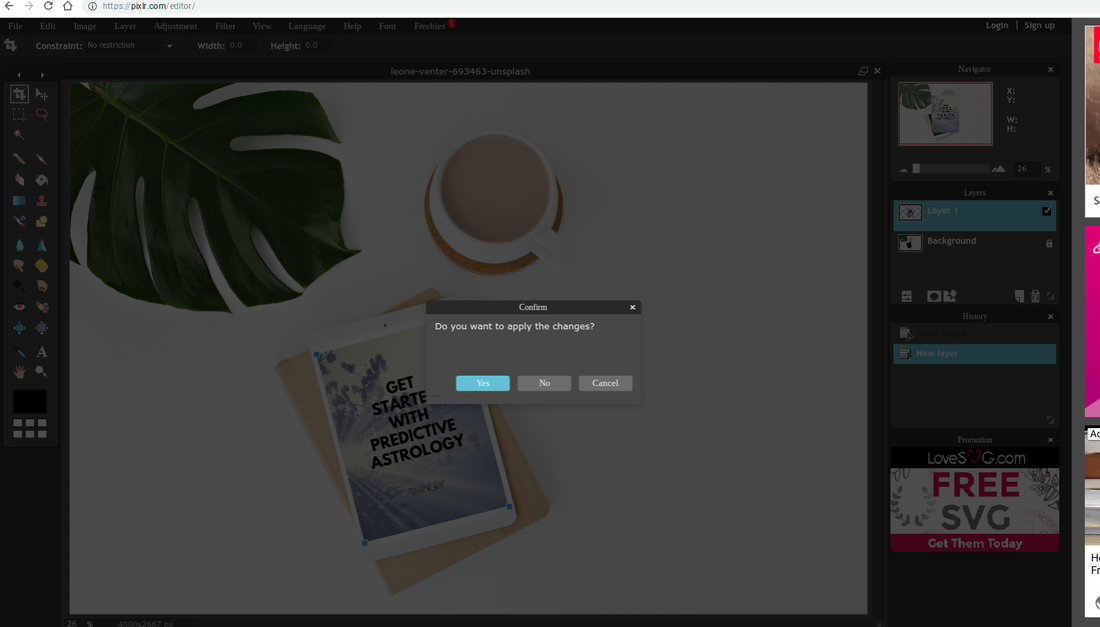
Drag the corners of the image to fill the screen as best as you can. You’ll want the screen covered. Once done, click off of the image, and it’ll ask you if you want to apply the changes; click yes:
Then download the image (click on File > Save or click CTRL + S to download). And voila, you have a mockup photo you can use on your sales page (or in emails or anywhere else!).
Here is a quick video showing how to use Pixlr to create the mockup (no audio):
Here is a quick video showing how to use Pixlr to create the mockup (no audio):
Lesson 4: How to Create my Super Special Secret Sauce Image
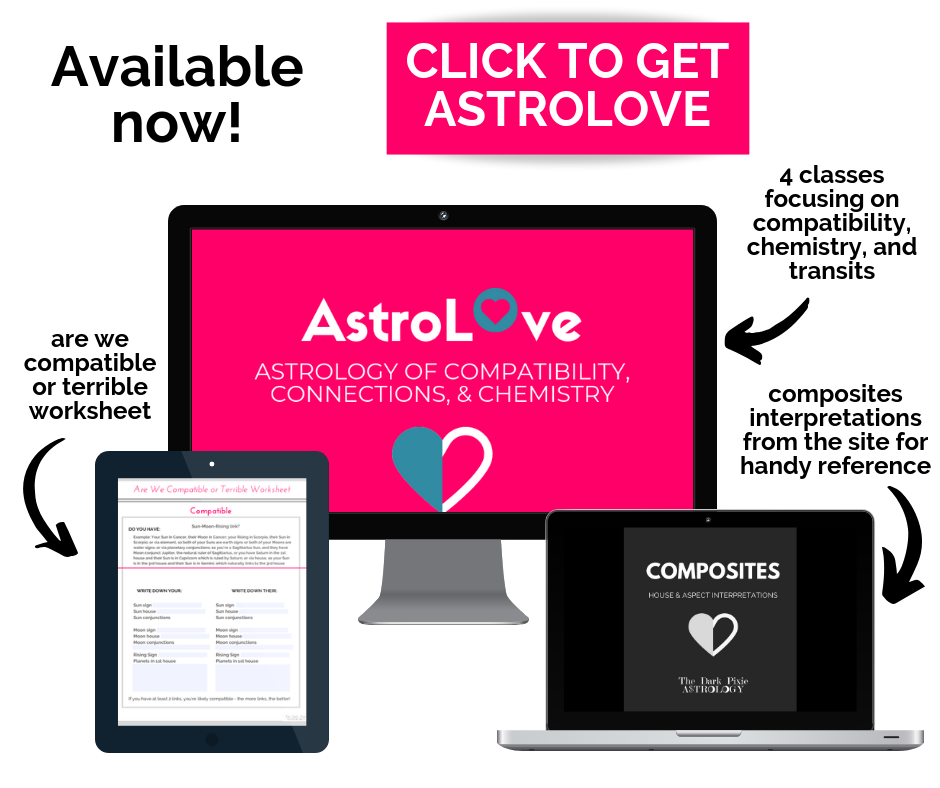
When I first sold AstroLove, I tried using this image in the sales emails:
I’m signed up for the email lists of a ton of gurus, and I noticed how most of them used an image like this when they were selling their products (mostly online courses). Mock images of computer screens, tablets, and smart phones showcasing what was in their courses. So I thought to try making my own and see if that worked at all. I wound up converting 1% of my email list into buyers - with only 2 emails! (you’ll usually need to send multiple emails to your email list to get to 1% or higher during a launch)
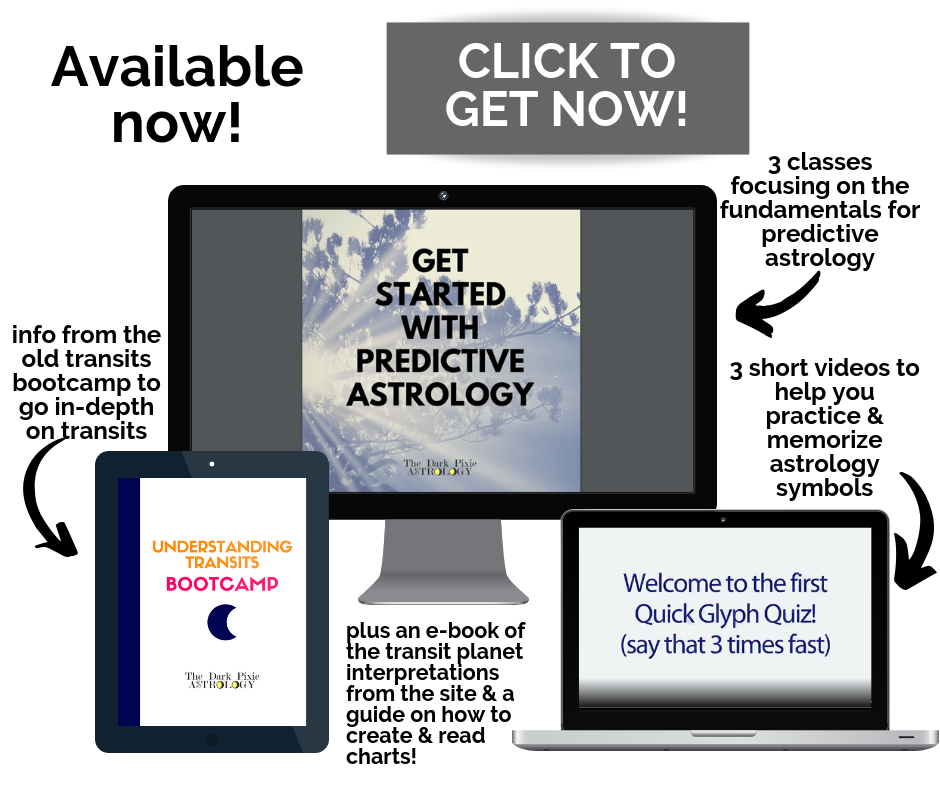
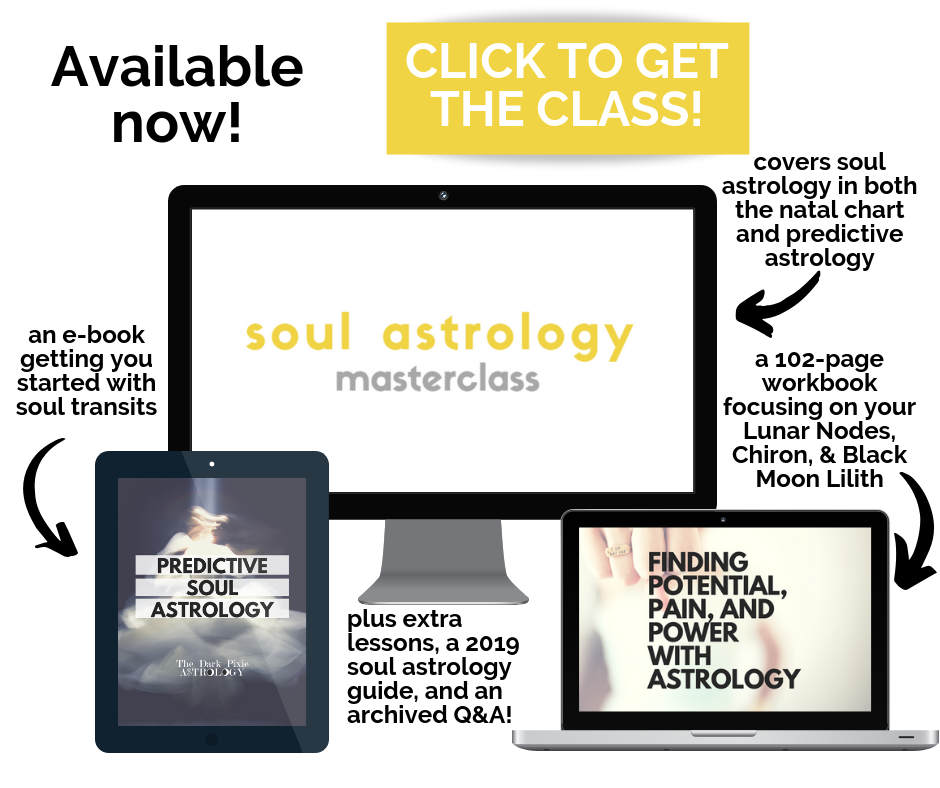
Since it was such a simple and easy thing, I created the same image for 2 of the mini courses that are available on the website. Get Started With Predictive Astrology and the Soul Astrology Masterclass:
Since it was such a simple and easy thing, I created the same image for 2 of the mini courses that are available on the website. Get Started With Predictive Astrology and the Soul Astrology Masterclass:
You can see it’s basically the same image, all I did was change what was on the mock screens, the written text, and the color for the rectangle at the top. These 2 courses are always available, and almost every opt-in offer is linked to one of them. In the first email that people get when they opt-in, they get the link to download again (in case they didn’t right away), sometimes a link to a relevant Pinterest board (to follow), quick legal info (how to unsubscribe), and mentions one of the courses that the opt-in offer is tied to. They’re pretty simple!
I was making an average of about $250/month in passive income from this. Passive income is money you make without doing any kind of launching or promotions (the sales that happen without any effort! People like to call it the money you make while you sleep). After I added these images to the emails that mentioned the relevant courses, it jumped immediately to $400/month! That was the only change. I was signing up the exact same number of people each month - which by the way, was only around 150 people per month! (you only need a few thousand visitors each month to convert 150, so that’s not a crazy number at all and one you should be able to hit quickly - but you do need to work for it!)
All from that image. It’s a secret sauce image! And it’s crazy simple, I just made it in Canva in like a half hour. Now, Canva has changed some of what’s available since I created these some months back, but you can still re-create for yourself in Canva (for free!). So here are your steps:
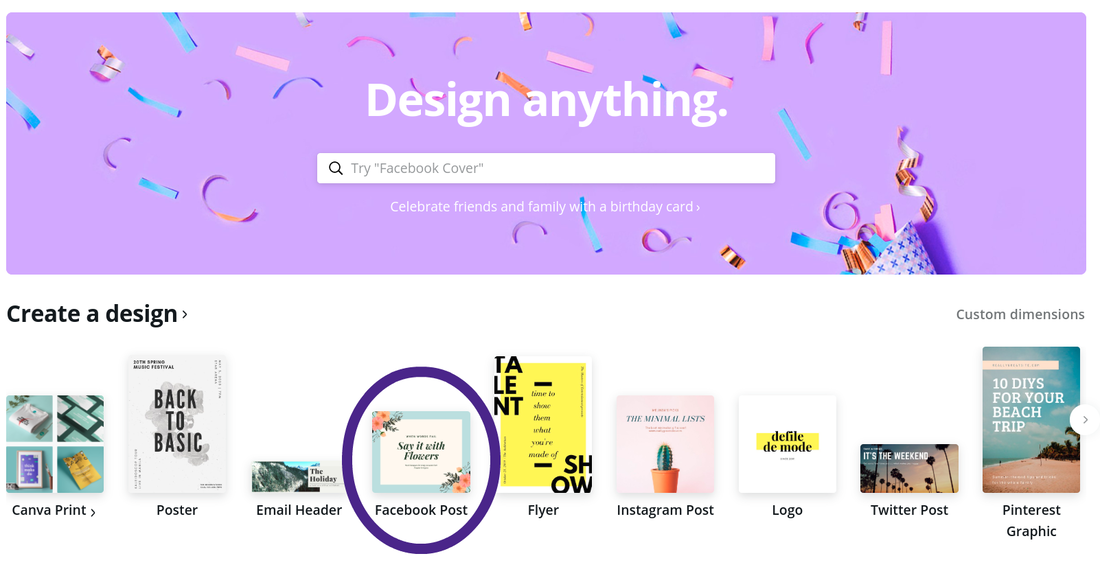
First go to Canva and log in, and select a Facebook Post:
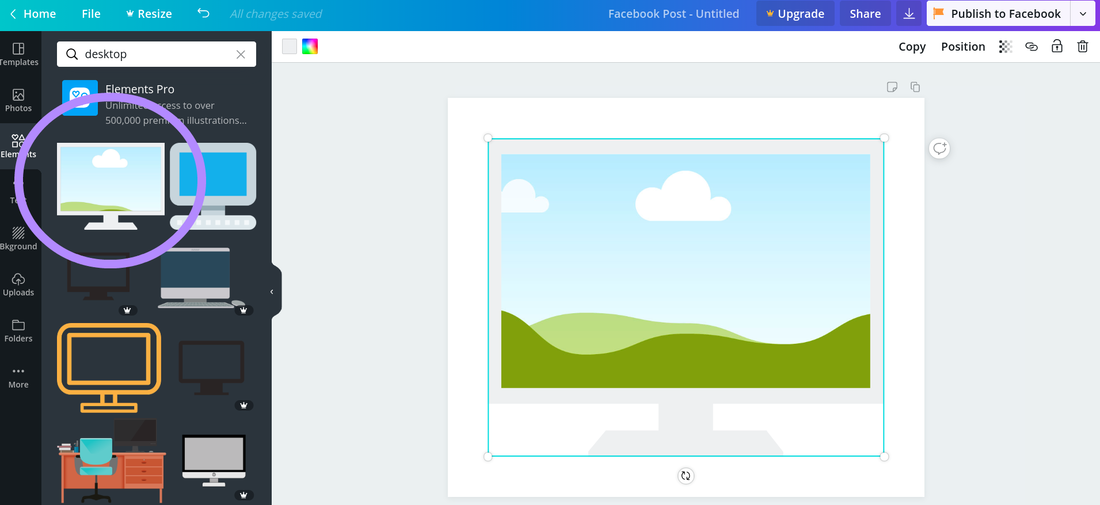
The background will automatically be white; keep it white (you’ll want to keep a white background for emails, it makes it easier to view). Click on ‘Elements’ in the left sidebar and in the search box, type in ‘desktop’ to pull up a desktop computer monitor frame. Click on it to add to the image:
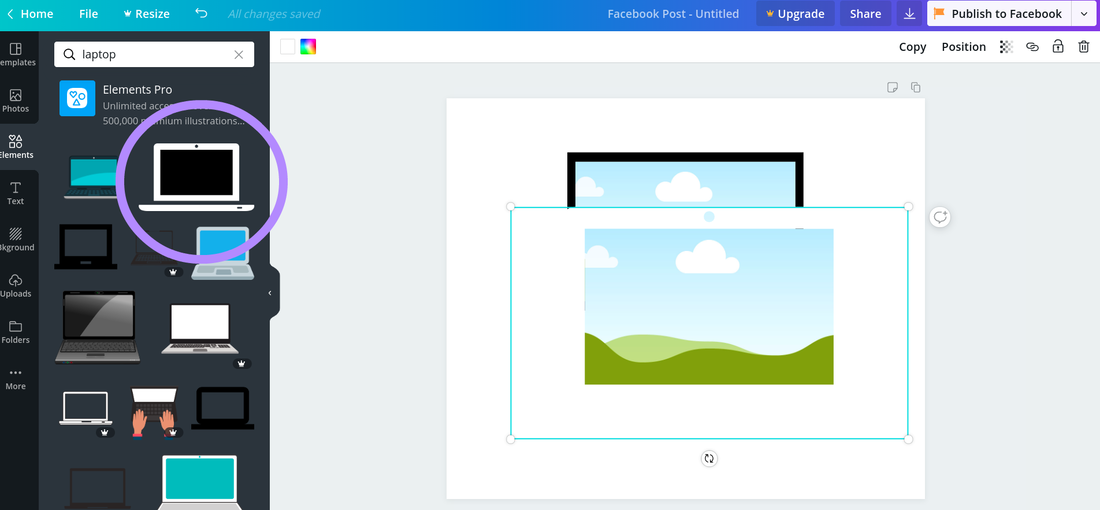
Resize and change the color to black. Then type in ‘laptop’ in the search box to pull up a laptop frame. Click on it to add to the image:
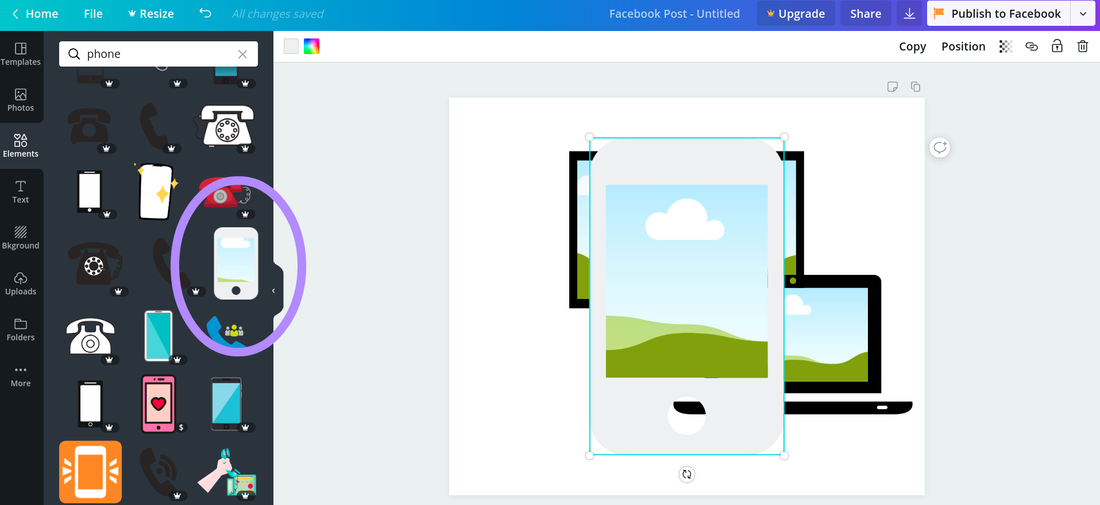
Resize, position, and change the color to black. Then type in ‘phone’ in the search box to pull up a smart phone frame. You may need to scroll a little to find this one and add to the image (and it’ll look more like a tablet than a phone):
Resize, position, and change the color to black. Then you can upload the images you want in each screen. The main logo works well for the desktop image; you can see with Get Started With Predictive Astrology, I instead used a screenshot of the cover. You can use screenshots for the laptop image as well (especially video); a cover image or image/screenshot of a worksheet/checklist or some added part to the course/product works well for the phone. The phone need a vertical image while the laptop and desktop monitor need something horizontal.
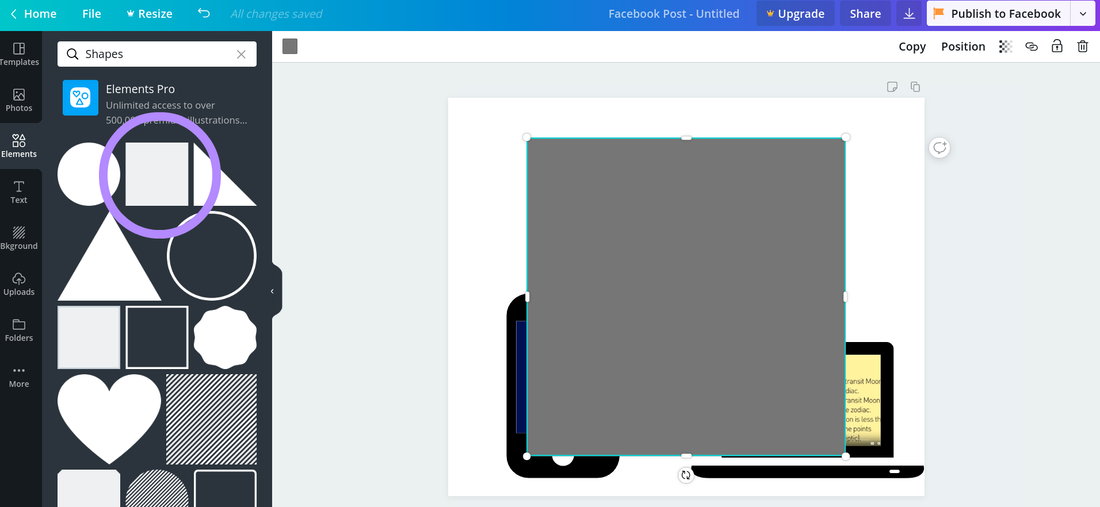
Now add the rectangle at the top of the image. Go to Elements and add a square box, then resize, position, and change the color:
Now add the rectangle at the top of the image. Go to Elements and add a square box, then resize, position, and change the color:
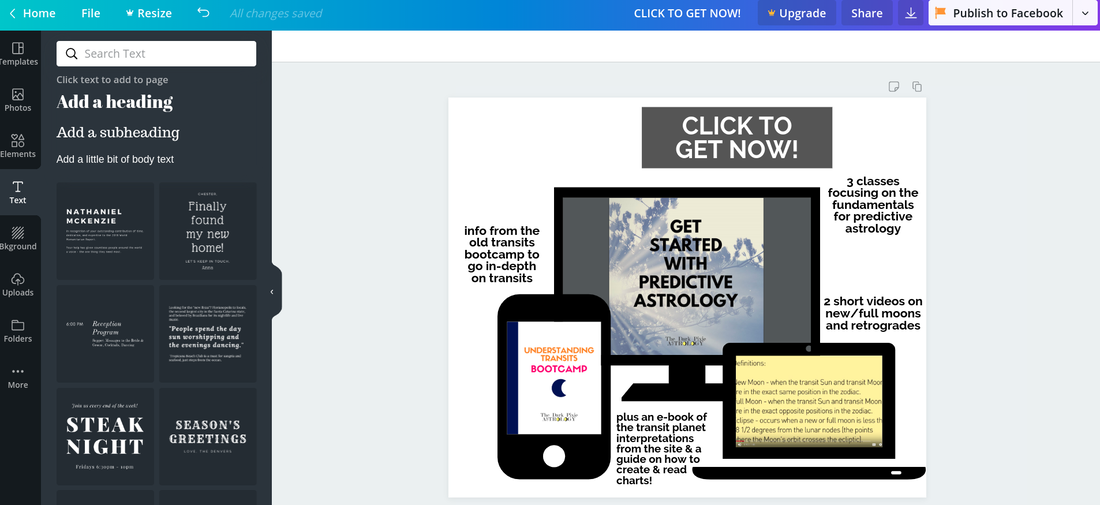
Now it’s time to add text! Click on Text in the left sidebar and start adding written text to the image. You’ll want text for the rectangle (click to buy!) and text describing (briefly) what’s included in the course/product with each image:
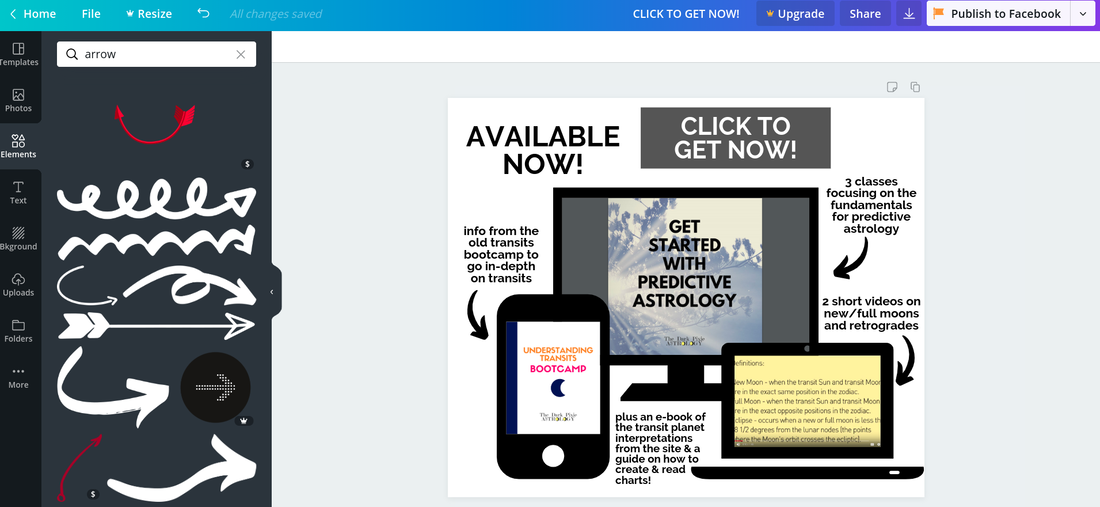
And then add arrows! In ‘Elements’, type ‘arrow’ in the search box to pull up a bunch. Scroll through them and find the arrows that’ll work for your image:
Once done, download it, and when you use it in your emails, link the image to the sales page so when they click on it, they’re brought right to the sales page. Done!
If you don’t have enough to be able to fill out 3 images, you could just use 2 of them instead. For example, say you want to use this with an e-book, you could use the cover image in the desktop monitor and then a screenshot of a page in the e-book, like the table of contents page, in the phone image. If you have a video class, workshop, or seminar that’s a single video, you can create a logo for the desktop monitor and take a screenshot of the video to use for the laptop image.
I’ve used this both for the 2 classes that are always available in Get Started With Predictive Astrology and the Soul Astrology Masterclass, but have also used it for AstroLove (where I used it first!), which is launched periodically. So you can also use it with your launches/promotions just as well as you can use it with the products that are always available in your welcome emails.
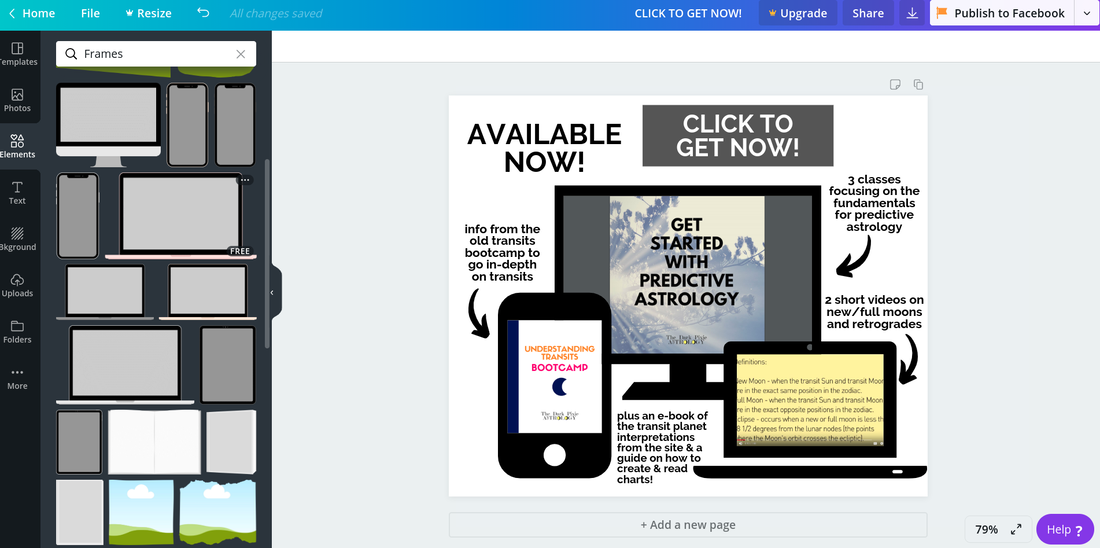
P.S. Canva has now made it easier to find the icons you need! In the editor, click on 'Elements' and then click on 'Frames' - there should now be a selection of phones, tablets, and computers you can use to add your images to (should be near the top so you don't have to do the searching as outlined here):
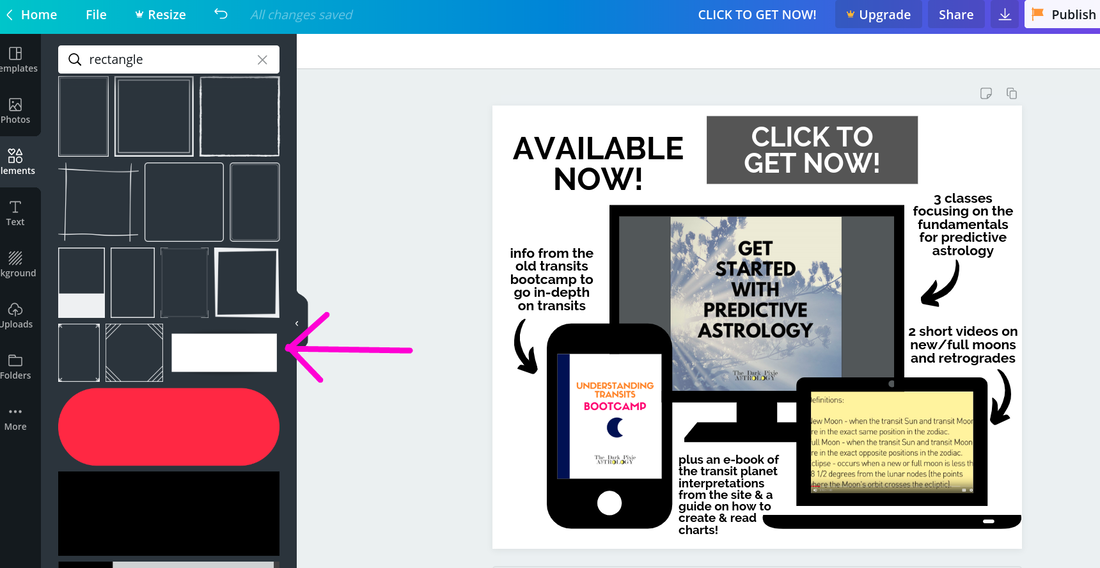
And if you want the 3D effect of the rectangle that I used in the original images instead of a regular one, go to Elements and type 'rectangle' in the search box, scroll a little and find the white rectangle below the outlines (you won't see the 3D effect until you click on it):
Lesson 5: Selling to Your Email List
Once you’re building up an email list, the whole point of your email list is to sell to it! Your email list is where you’ll usually find your most ardent supporters who want to use your products or services. Build up a good email list, and that’ll sustain you for a long time!
Now, this doesn’t mean when you’re ready to sell a product or service that you just shoot off an email to your email list saying it’s available and a crapload of people buy. That doesn’t usually happen! You need to come up with promotions, strategies, and first, prime people to buy.
Priming people to buy your product or service isn’t too difficult. Basically, you just want to get them thinking about your product or service. You start with things that are in the general arena of what your product/service is focused on to get them thinking about it, and then you mention that you’ll be offering the product/service soon. For example, when I offered AstroLove, I wrote some blog articles about love astrology (and linked to them in emails), and wrote some newsletter articles about love astrology. Gets them thinking about it! Since AstroLove was so inexpensive, I didn’t warn in advance that it was coming though. With stuff that’s really low priced, you can get away with that, but with higher priced products and services, you’ll want to warn people it’s coming. When I did the Professional Pixie launch, I started warning my email list several weeks in advance it was coming. This way, you can also offer people the ability to opt out of hearing about it if they’re not interested and exclude them from promo emails (helps cut down on unsubscribes, which tend to be higher during promotions/launches when you’re sending extra emails; though make no mistake, some people will ignore the warnings - can’t make everyone pay attention!).
So, when you’re going to put something out, create blog articles, newsletter articles, Youtube videos, Instagram or Pinterest images, Twitter and Facebook posts, all tied around what you’re going to offer. You don’t have to do all of them (unless it’s a big product or service, like $1,000; then you’ll have to do everything, plus some live events like live chats or webinars - but please don’t do this right off of the bat! Start small, start small, start small - you will overwhelm yourself if you go big right away).
You’ll need to focus a little on your strategy as well. Is this going to be a launch for a specific period of time? For a specific number of people? Will there be a sale period (if this isn’t a sale)? Is there a bonus period? You will find that people generally won’t get up off of their bums to buy unless there is something called urgency - they’ve only got a limited amount of time to buy. So you’ll usually want to limit the amount of time the promotion will be active, or limit the amount of people who can buy. I find an added benefit for you is it also limits the amount of time you’ll have to spend running the launch (which can be very, very time-consuming! When I would periodically open for readings, I used to joke that it was more exhausting booking readings than performing them LOL).
Then create your sales emails! You’ll usually need to create 3-10 sales emails that will be sent during a launch. Your first email will usually be the day before, and you can go a little into what the product/service is, some details, and get people ready for when it’ll be available the next day. The email sent on the day of launch, you’ll open the product/service to your email list, and this email can be very detailed, getting into everything that’s included in the product/service. You’ll close with an email on the last day, warning people it’s the last day for them to buy. In the middle of that, you may have extra emails (generally speaking, the bigger the product/service, the more emails - just like with a sales page!).
The emails in the middle can cover a variety of things - behind the scenes of you creating the product or what you go through delivering the service, testimonials or case studies from people you’ve helped or praise from fellow experts, addressing potential problems that people have that your product/service can help them with, debunking myths about the focus of your product/service, sharing your personal story for why you created the product/offer the service or how you got into this. And some emails may simply be a reminder of how much time is left for the offer (or for special bonuses or a limited-time sale price), or how many people can buy (if you’re limiting the number of people).
I’m going to touch on 3 launches that I’ve done so you get an idea of how this works. First AstroLove; I first offered it in May 2019. As I mentioned, I wrote a series of blog articles focusing on love astrology (one for each element and how they approach love and relationships, from April 24th - May 15th). I also wrote newsletter articles focusing on love astrology - one on April 29th that focused on how Saturn and Pluto retrograde could impact relationships, and with the monthly newsletters for May (the Moons in synastry) and June (how relationship astrology works), with both linking to various love astrology articles. So even though it was a super low-priced product ($17), there was a lot of priming!
As I mentioned with the super special image, I only used 2 emails for AstroLove - an email day of saying it was available and what was in it, and a reminder email the next day. Since it was a low-priced product and I did so much priming, I didn’t need to go with a big launch at all. I also decided to only make it available for a little over 2 days (opened Wednesday morning, closed Friday evening), so that allowed the urgency to be strong. It was offered to just over 7,000 people on my email list (so not the entire list, some people were omitted - segmentation is important!), and 87 people bought, so about 1.2% converted. Which isn’t bad for 2 days and 2 emails! I think the priming along with the super special image was what made that happen.
Now we’ll go into what I did for the Soul Astrology Mini Bootcamp; I ran this bootcamp 9 times in 2018, and it was just 2 weeks of info sent via email to participants along with 2 Q&A’s. I opened this up for $25 (which should’ve been higher!), and I limited them to 20 people each (except for the first, but it wound up being waaay too much for the Q&A so I limited the rest!). By limiting the number of people (and such a low number), that instills the urgency to get people to buy. I opened this up 3 times in 2018, once for the first time (with no limit in June), and then twice for 4 rounds each (with the 20 people limit in August and September). The first time was offered for 4 days to about 3,700 people (so again not the full email list) and about 40 people signed up. The remaining rounds were offered to around 1,000 and 2,000 subscribers respectively (again, not the full list, and not a high number!) and sold out in a few days each (so 80 people each time, twice as much as the first round and offered to less email subscribers - because of limiting the number of people!).
And you know what I didn’t do? I didn’t prime them! I didn’t plan out blog or newsletter articles around the subject, I just went into the launch. Since it was limited and inexpensive, that worked out okay. And it’s a subject I get asked about constantly, so I knew people would be interested. But I’d still recommend priming!
There were basically just 3 emails for the bootcamp. One was sent the day before saying it would be available and going into Chiron, the Lunar Nodes, and Black Moon Lilith (which were covered in the bootcamp). Day of email was saying it was available and details about the bootcamp. The next day was an email about how I personally used the 3 points (so going into them in my natal chart and how I’ve worked with them - getting personal). That personal email was the one where the most people would jump on after receiving. I’m not super comfortable getting personal, but it does work to help people connect with you! And there were a couple of update emails for how many spots were available. That was it!
Now for this course - Professional Pixie! You signed up, so you know what some of it was. This was the highest-priced product I’ve offered, so a lot more went into it. I started warning people about 3 weeks beforehand with a simple mention that I’d be doing a course on becoming a spiritual professional soon, and gave them the ability to opt out of promo emails.
Leading into the launch, I wrote 3 blog articles tying in (When to Become a Spiritual Entrepreneur - March 13th; How to Start an Online Astrology Business - March 27th; Why Astrology is the New Black - April 3rd), and 3 newsletter articles tying in (Your Marketing Style by Jupiter & the 9th House - March 25th; Your Professional Face With Your Midheaven Sign - April 1st; Changing Professions With Uranus in Taurus - April 8th; and all 3 mentioned the course and had the opt-out option). And I started a new opt-in (7 Days of Self-Care for Spiritual Entrepreneurs). So a lot leading in!
For the emails, there were 12 total. 2 were sent on the first day (Tuesday April 9th; the first saying it was available and giving details, the second sent 5 hours later - I had to redo the sales page since the original wasn’t working for iPhones for some reason, so the second email had the new link, and focused on one of the objections someone would have to signing up - not believing in yourself). Email 3 was sent the next day, Wednesday April 10th (focusing on how you’ll have access to help, and reminding of the expiring assessment bonus), and email 4 was sent the day after that, Thursday April 11th (focusing on mistakes people make trying to do this). Then came the weekend, so there were no emails Friday or Saturday; email 5 was sent Sunday April 14th (focusing on what to do before becoming an astrologer), and email 6 was sent Monday April 15th (a reminder of the expiring bonus to be entered into the mentorship giveaway). Then email 7 was sent Wednesday April 17th (outlining what a day in the life of an astrologer looks like), email 8 was sent Friday April 19th (a light email on signs you should be an astrologer), and email 9 was sent Sunday April 21st (a 2 day notice; this email was only sent to people who clicked to view the sales page in previous emails but didn’t buy). It was closed April 23rd, but an extended payment plan was offered again the next day, Wednesday April 24th until Friday April 26th (an email was sent each day with the offer and reminder, so 3 more emails; this was only offered to those who viewed the sales page but didn’t buy during the launch). So the launch lasted from April 9th - 26th (2 ½ weeks) and consisted of 12 emails.
I did mention the course on Facebook 3 times as well with a little bit of info and link to the sales page. I usually reserve promotions just for my email list, but opened this up publicly. That is something you can decide when you do launches, are you going to only offer to your email list or open it up to anyone? If you open it up publicly, then you can also post about it on social media as part of your launch strategy (to help prime people leading up to the launch and to include stuff during the launch; social can be especially helpful for anything live, like doing live streaming on Youtube, or FB or IG Lives, or live Twitter chats).
Lesson 6: Extra: Creating Online Courses
Online courses are all the rage - you’re using one now! An online course is a course that is taken online. There are a variety of ways you can deliver an online course to students - email, on a platform like Teachable, via audio or video or written, live or recorded - it’s up to you! There’s really no right or wrong answer. Go with what you’re comfortable with.
People enjoy online courses because they tend to be more flexible than a course in school, and while they may be able to find all of the information themselves, an online course saves them time and energy, giving them the info they need in one place. It cuts out the extra info that they don’t need, and allows them to focus on what is necessary for their learning.
Online courses can be like regular courses you take in school, and include things like tests and diplomas, but most don’t because that’s not really the purpose of most online courses. Most online courses are taken by adults who want to learn something specific they can apply and use in their life. This doesn’t have to be professionally (unlike with courses in college/university). Many are for fun, so you don’t have to focus only on a course that will be used for professionals. This one, Professional Pixie, was the first one I’ve done for professionals. All of the rest have been for people who just want to learn astrology!
In this niche, most of the online courses out there focus on either teaching people the modality (like the astrology classes on The Dark Pixie Astrology), or to improve their lives in some way (usually using the modality). It doesn’t need to be long, and it doesn’t need to be complicated. It’s actually best to start short and simple!
Many want to start with the big thing right away, but you’re just putting the cart before the horse and setting yourself up for failure (a common practice among us spiritual types). You need to build up an audience first before you can successfully do a big online course (you’ll see this often called a “flagship course”).
I’m not judging - I did it too! I built up a big astrology course, but I had only just started my email list, so only had a few hundred subscribers to sell to. A whopping 2 bought the course - ha! At first I was bummed, but then I realized my mistake. I redid it, and since then, created 2 e-books, 2 bootcamps, and 5 smaller online courses from the original content (2 are on the site currently, Get Started With Predictive Astrology and Make Astrology Predictions). Over 1,000 people have gotten them!
So my first bit of advice with online courses is start small and with an email list. I’d say once you get to about 2,500 you can start thinking about a course. Standard conversion rates are 1-3%, so you should make 25-75 sales with 2,500 email subscribers. Under 2,500? You can still go the online course route if you insist on it, you’re just not going to make very much, and online courses require more work upfront (even a small course) and more work to sell.
I would say to do an e-book instead if your list is smaller (I launched the first e-book to only around 1,500 subscribers and made over 100 sales). The great thing about starting with an e-book is you can launch that much quicker (should only take you a few weeks to write and put together), and you can use your e-book as a framework for an online course (just add extra lessons, quizzes, worksheets, etc.), which both lessens the amount of work that’ll take (time saver!) and allows you to see if people are interested (if your e-book sells, you know you’ve got a topic people want to invest in; this way, you’re not wasting your time on a course that won’t sell).
The first step can be difficult - what should your online course focus on?! You know what your specialties are, so focus on those first and then narrow down. You’re an astrologer specializing in AstroCartoGraphy? Focus on something in relocation astrology. You’re a Tarot reader specializing in love and relationships? Focus on something in the love and relationship realm. Then start narrowing down.
You can decide if you want to focus your online course on something that will teach people how to do your modality (like a course on how to use AstroCartoGraphy themselves, or how to use Tarot in their relationships themselves), or a course focusing on some benefit to them and their lives using your modality (like how to choose the right place to live astrologically, or how to improve their romantic relationships with Tarot).
You want to take people from start to finish in your online course. You can think about the end result you want them to have, and map out the steps it would take for them to get there. These can be your “lessons”. If it’s a big process, then you’re thinking too big and need to drill down some more. You could focus on 2-3 of the steps outlined instead, and create an online course for those.
In the end, you want people to have a result from your online course, whatever it may be. So, to take you through some of my own - I specialize in Western predictive astrology, so my focus was teaching people how to do it themselves. On the site, Get Started With Predictive Astrology is specifically aimed at beginners, people who know little-to-no predictive astrology techniques, and goes through the foundational basics they need to learn (from what a Zodiac Wheel is and how to read an ephemeris, to using New/Full Moons and retrogrades). Make Astrology Predictions is the next step, once they’ve learned all of that, focusing on intermediate techniques (progressions, returns, and predictive analysis). So first your specialty, then teach or benefit, then narrow (Western predictive astrology > teach > super beginners = Get Started With Predictive Astrology).
Once you’ve figured out what your course is going to focus on, you need to figure out how you’re going to deliver it. People probably spend too much time focusing on this step! They think there’s only one right way. There isn’t! It’s all about what you’re comfortable with. If you’re comfortable, that allows you to create the best product and deliver the best information, and that’s all people want.
You can choose:
You’re going to take the student from start to finish in the online course, so outline the lessons that you’ll need. It can be as little as 3, particularly for audio, video, or live. It shouldn’t drag on, but it should still offer a good amount of information to give them the end result.
Audio and video is usually going to be 10-20 minutes per lesson (more than that and people won’t listen/watch the whole thing - short attention spans!). You can do longer for live since it’s more like a classroom environment, but should still try to keep it under 1 hour. Written can be pretty much as long as you want, but it’ll likely average 1,000-2,000 words per lesson.
If there’s more than a handful of lessons, you’ll likely want to separate them into sections (you can call that whatever you’d like - unit, module, class, etc.). This just helps organize the course, and helps people feel like they don’t have to go through 12 lessons before reaching an end point.
Don’t hold back on information. People are paying you for information so this isn’t the time to be mysterious (looking at you Scorpios!). They need your expertise. You know what you’re talking about! And inject your personality into the course. Give it your special something ;)
Also think about the extra stuff you’ll include in the course. You’ll want to include something extra for every lesson or section, things like worksheets, checklists or cheat sheets, slides, exercises, prompts, templates, or a resource list.
You may want to think about how available you’re going to be to students. Most smaller online courses don’t offer availability to you as the teacher (it’ll eat up a lot of your time, so it’s a question of is it worth it). Bigger flagship courses will usually include some access to you as the teacher, but smaller online courses are usually DIY.
You can also consider having a bonus community to go with your online course. These days, it’s usually a Facebook group just for students of that course. It’s not necessary for smaller courses though (and may end up being more work than it’s work for a small course), so only do it if you’ve got the time and love Facebook! (or some other place to house the community) Otherwise, you can just keep this option for bigger flagship courses.
People enjoy online courses because they tend to be more flexible than a course in school, and while they may be able to find all of the information themselves, an online course saves them time and energy, giving them the info they need in one place. It cuts out the extra info that they don’t need, and allows them to focus on what is necessary for their learning.
Online courses can be like regular courses you take in school, and include things like tests and diplomas, but most don’t because that’s not really the purpose of most online courses. Most online courses are taken by adults who want to learn something specific they can apply and use in their life. This doesn’t have to be professionally (unlike with courses in college/university). Many are for fun, so you don’t have to focus only on a course that will be used for professionals. This one, Professional Pixie, was the first one I’ve done for professionals. All of the rest have been for people who just want to learn astrology!
In this niche, most of the online courses out there focus on either teaching people the modality (like the astrology classes on The Dark Pixie Astrology), or to improve their lives in some way (usually using the modality). It doesn’t need to be long, and it doesn’t need to be complicated. It’s actually best to start short and simple!
Many want to start with the big thing right away, but you’re just putting the cart before the horse and setting yourself up for failure (a common practice among us spiritual types). You need to build up an audience first before you can successfully do a big online course (you’ll see this often called a “flagship course”).
I’m not judging - I did it too! I built up a big astrology course, but I had only just started my email list, so only had a few hundred subscribers to sell to. A whopping 2 bought the course - ha! At first I was bummed, but then I realized my mistake. I redid it, and since then, created 2 e-books, 2 bootcamps, and 5 smaller online courses from the original content (2 are on the site currently, Get Started With Predictive Astrology and Make Astrology Predictions). Over 1,000 people have gotten them!
So my first bit of advice with online courses is start small and with an email list. I’d say once you get to about 2,500 you can start thinking about a course. Standard conversion rates are 1-3%, so you should make 25-75 sales with 2,500 email subscribers. Under 2,500? You can still go the online course route if you insist on it, you’re just not going to make very much, and online courses require more work upfront (even a small course) and more work to sell.
I would say to do an e-book instead if your list is smaller (I launched the first e-book to only around 1,500 subscribers and made over 100 sales). The great thing about starting with an e-book is you can launch that much quicker (should only take you a few weeks to write and put together), and you can use your e-book as a framework for an online course (just add extra lessons, quizzes, worksheets, etc.), which both lessens the amount of work that’ll take (time saver!) and allows you to see if people are interested (if your e-book sells, you know you’ve got a topic people want to invest in; this way, you’re not wasting your time on a course that won’t sell).
The first step can be difficult - what should your online course focus on?! You know what your specialties are, so focus on those first and then narrow down. You’re an astrologer specializing in AstroCartoGraphy? Focus on something in relocation astrology. You’re a Tarot reader specializing in love and relationships? Focus on something in the love and relationship realm. Then start narrowing down.
You can decide if you want to focus your online course on something that will teach people how to do your modality (like a course on how to use AstroCartoGraphy themselves, or how to use Tarot in their relationships themselves), or a course focusing on some benefit to them and their lives using your modality (like how to choose the right place to live astrologically, or how to improve their romantic relationships with Tarot).
You want to take people from start to finish in your online course. You can think about the end result you want them to have, and map out the steps it would take for them to get there. These can be your “lessons”. If it’s a big process, then you’re thinking too big and need to drill down some more. You could focus on 2-3 of the steps outlined instead, and create an online course for those.
In the end, you want people to have a result from your online course, whatever it may be. So, to take you through some of my own - I specialize in Western predictive astrology, so my focus was teaching people how to do it themselves. On the site, Get Started With Predictive Astrology is specifically aimed at beginners, people who know little-to-no predictive astrology techniques, and goes through the foundational basics they need to learn (from what a Zodiac Wheel is and how to read an ephemeris, to using New/Full Moons and retrogrades). Make Astrology Predictions is the next step, once they’ve learned all of that, focusing on intermediate techniques (progressions, returns, and predictive analysis). So first your specialty, then teach or benefit, then narrow (Western predictive astrology > teach > super beginners = Get Started With Predictive Astrology).
Once you’ve figured out what your course is going to focus on, you need to figure out how you’re going to deliver it. People probably spend too much time focusing on this step! They think there’s only one right way. There isn’t! It’s all about what you’re comfortable with. If you’re comfortable, that allows you to create the best product and deliver the best information, and that’s all people want.
You can choose:
- Written (this is usually lessons sent via email or as downloadable PDF files)
- Audio (recorded lessons as MP3 files they can download or listen to somewhere)
- Video (recorded video lessons as MP4 files they can download or watch somewhere)
- Live (live workshops/seminars/lectures streamed online, usually through something like Zoom or Youtube or Facebook Live, or with webinar software like WebinarJam)
You’re going to take the student from start to finish in the online course, so outline the lessons that you’ll need. It can be as little as 3, particularly for audio, video, or live. It shouldn’t drag on, but it should still offer a good amount of information to give them the end result.
Audio and video is usually going to be 10-20 minutes per lesson (more than that and people won’t listen/watch the whole thing - short attention spans!). You can do longer for live since it’s more like a classroom environment, but should still try to keep it under 1 hour. Written can be pretty much as long as you want, but it’ll likely average 1,000-2,000 words per lesson.
If there’s more than a handful of lessons, you’ll likely want to separate them into sections (you can call that whatever you’d like - unit, module, class, etc.). This just helps organize the course, and helps people feel like they don’t have to go through 12 lessons before reaching an end point.
Don’t hold back on information. People are paying you for information so this isn’t the time to be mysterious (looking at you Scorpios!). They need your expertise. You know what you’re talking about! And inject your personality into the course. Give it your special something ;)
Also think about the extra stuff you’ll include in the course. You’ll want to include something extra for every lesson or section, things like worksheets, checklists or cheat sheets, slides, exercises, prompts, templates, or a resource list.
You may want to think about how available you’re going to be to students. Most smaller online courses don’t offer availability to you as the teacher (it’ll eat up a lot of your time, so it’s a question of is it worth it). Bigger flagship courses will usually include some access to you as the teacher, but smaller online courses are usually DIY.
You can also consider having a bonus community to go with your online course. These days, it’s usually a Facebook group just for students of that course. It’s not necessary for smaller courses though (and may end up being more work than it’s work for a small course), so only do it if you’ve got the time and love Facebook! (or some other place to house the community) Otherwise, you can just keep this option for bigger flagship courses.
Lesson 7: How To's
I was going to put together some how to’s for how to use different services, but realized that was going to be insane (know your limits!). So I’m just going to link to lots of Youtube videos that already have tutorials for you (and are much better than I could ever do!). Youtube is seriously a treasure trove of information and tutorials, so anything you want to learn to do, go to Youtube and search for it. You’ll probably find it!
Mailchimp Tutorials:
https://www.youtube.com/watch?v=q8qBaCD5coE
https://www.youtube.com/watch?v=dHER8kM37ew
https://www.youtube.com/watch?v=KDLQ6sKkWmQ
https://www.youtube.com/watch?v=sSdSVUMwAoo
Mad Mimi Tutorials:
Creating and sending emails: https://www.youtube.com/watch?v=EC2xcjra6K0
Creating signup forms and drips (autoresponders): https://www.youtube.com/watch?v=sOHJtPvjNeM
Convertkit Tutorials:
https://www.youtube.com/watch?v=lzjCWW11HwE
https://www.youtube.com/watch?v=t5e-9N3snN8
https://www.youtube.com/watch?v=_wK5QDWZaBM
Aweber Tutorials:
https://www.youtube.com/watch?v=E2nK4tW6LKk
https://www.youtube.com/watch?v=NGKbvf0brNk
Mailerlite Tutorials:
https://www.youtube.com/watch?v=LCmJZmMrSRs
https://www.youtube.com/watch?v=W1CJIQ55wM0
https://www.youtube.com/watch?v=WnmN4CkxtLM
Getresponse Tutorials:
https://www.youtube.com/watch?v=eZ334aDerSY
https://www.youtube.com/watch?v=a_VtXp_x4XA
For popup forms (for email collection; also mats and bars), I’ve used Sumo and Hello Bar; you can hook them up directly to your email service provider so they push the email address someone submits when signing up directly to your email service provider without you doing anything, HOWEVER thanks to GDPR, that might not be acceptable anymore unless you have all of the requisite info on your popup/mat/bar (which most don’t since there’s not enough room to fit). So Instead of allowing people to sign up directly on the form, I instead have a button they can click on (call to action) that brings them to the signup page (with all of the requisite info). It’s up to you what you want to do though!
Sumo: https://www.youtube.com/watch?v=qLCsuPm-lKk
Hello Bar: https://www.youtube.com/watch?v=PQQzkXNKyGk
Selling with:
Sendowl: https://www.youtube.com/channel/UCbzM1MjvVUU6tAOzgeFrO9g/videos
Gumroad: https://www.youtube.com/watch?v=j1GIQKSF5jY
Using Zapier (helps a ton with automating): https://www.youtube.com/user/ZapierApp/videos
Online courses:
An aside - this is a workshop that was done through Teachable (I’m not sure if they run it anymore, this video is from 2016), but it’s 7 Steps to Launch Your Own Profitable Online Course. I’m linking to it because I took a course about creating an online course (LOL @ that!) that was over $2,000, and then I signed up for Teachable and they did this, which covers almost the exact same stuff as was in that big course - for free! And it’s now on their Youtube channel. So if you’re going to create an online course, watch the video:
https://www.youtube.com/watch?v=LucXkHIvE3Q
Creating a course on Teachable: https://www.youtube.com/watch?v=bp9i8XxMubQ
Creating a course on Thinkific: https://www.youtube.com/watch?v=jZc_QQDjppc
Creating a course on Udemy: https://www.youtube.com/watch?v=YI-hiRL4CdI
Navigate:
Go to Unit 1: Creating Your Online Home >>>
Go to bonus class, Using Pinterest >>>
Go to Unit 2: Growing a Profitable Client List >>>
Go to Unit 3: Going Beyond Readings >>>
Go to bonus class, Email List Building >>>
Go to bonus class, Using the Spiritual Woo-Woo in Your Business >>>
Go to bonus class, Using Pinterest >>>
Go to Unit 2: Growing a Profitable Client List >>>
Go to Unit 3: Going Beyond Readings >>>
Go to bonus class, Email List Building >>>
Go to bonus class, Using the Spiritual Woo-Woo in Your Business >>>
